It doesn’t matter how beautiful your car is, how well it’s built, or how fast it goes. If there’s some tiny defect anywhere, that’s what everybody, including you, is going to look at. It’s not fair, but it’s reality. The doors are critical. They must look right and open and close correctly.
My all-steel, full-fendered, ’35 Dodge pickup is the kind of street rod that should draw all kinds of attention. Not that I am an attention seeker or anything remotely unsavory like that. But I am seeking attention-grabbing good looks from an old work truck. If you think gravity does a number on your body, imagine if it were a bit older and made of tired steel. A lot of sagging goes on. ‘Nuf said about that.
There are so many variables involved in hanging doors that it scares a lot of people away from the job. The trick is to isolate the problems before the final paint is on and when no one is afraid of scratching a mirror-like finish.
 Then making small changes, one at a time, until each problem is identified and sorted, and the old doors are correctly re-hung.
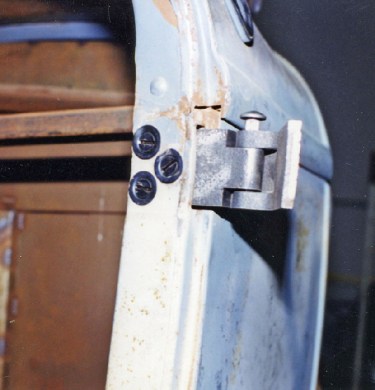
After solving the problems with the front fenders and cowl area, expert builder, Ralph Derico, fitted the doors on my pickup. Technically you “hang” a door. These are the original doors and so Ralph had to re-hang them. Plainly visible here are Ralph’s identification of areas needing attention.

These doors required careful adjustments to make them fit the newly cleaned up cab. Once body parts are separated, sandblasted, and moved around, a lot of shifting occurs. A little like pieces to an old puzzle that have been stored in humid climates. They should all fit but they don’t quite.
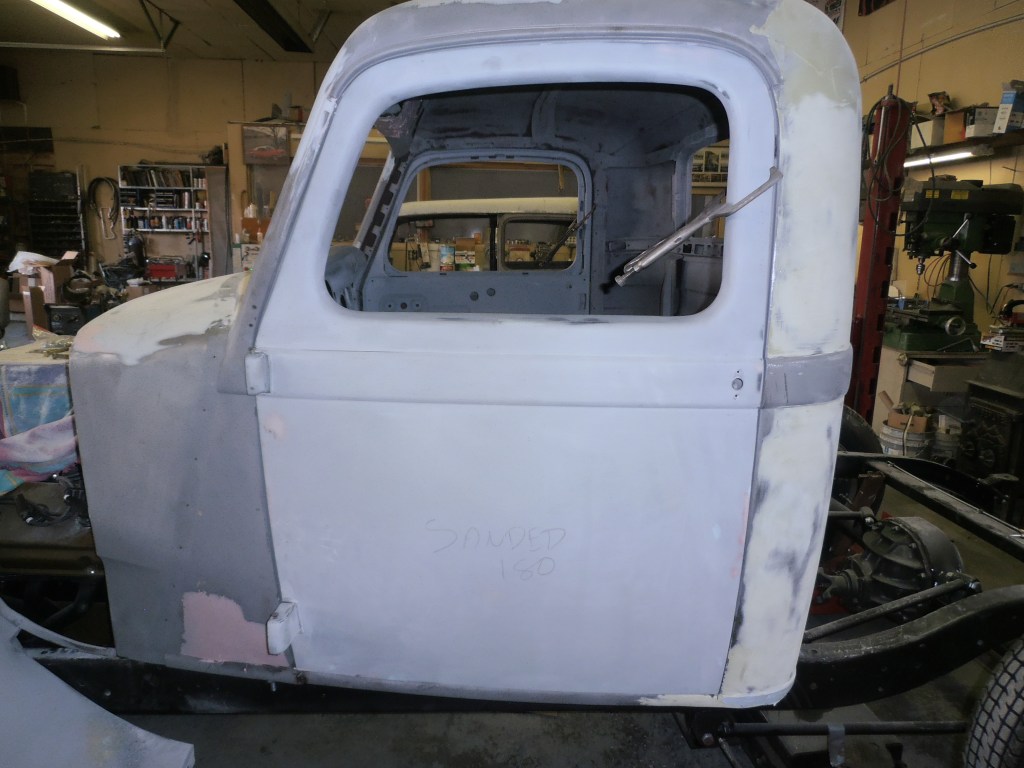
If you look carefully at this photo you can also see that Ralph has installed the steering column on the dash. If you look at the angle you can see that it is pointed almost horizontally straight ahead. You can also see that Ralph marks each piece of the body with the stage of sanding last completed. This door is marked “sanded 180” meaning that the last sandpaper used was 180 grit.
A big issue in the process of door hanging is door latches. Once you swallow the condition of the doors and what it’s gonna take to fix them, it’s time to realize that it’s not only the cosmetic portion of the assembly that has seen better days. Just like the rest of the mechanical pieces involved in the truck, the latches and striker plates are pretty much shot as well. After years of use, the latches have lots of slop in them.
When the old, original bear claw latches wear out several problems ensue. For one, when the door isn’t sucked up tight into the weatherstrip around the jamb it allows for all kinds of wind and road noise to seep through the gaps. Couple those noises with the clanking and banging of the door itself against the jamb and before you know it, you got a symphony of sounds pouring through the cab. Another area that is affected is door alignment. A key point in aligning the door is utilizing the latch. When the latch isn’t securing a strong bond it can cause misalignment of highly visible body parts. l
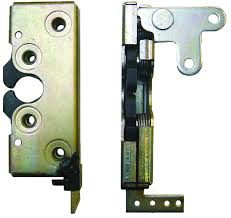
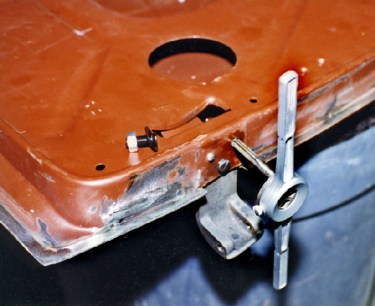
The miracle elixir is to install late-model-styled bear claw latches and new hinges. Fortunately for the modern street rodder, the aftermarket has made available replicas of these old pieces, usually with improved mechanical bits.
New hinges have no mounting holes in them. Once the hinge is positioned properly they can be drilled, tapped and mounted. Note the small raised reveal around the hinge opening.
When we say that a lot hinges on this thing or action, we begin to feel the cultural connection we have to hinges. Hinges hold a lot weight. Much about a car’s functionality is related to its hinges. Lessons for life in having strong, smooth hinges.


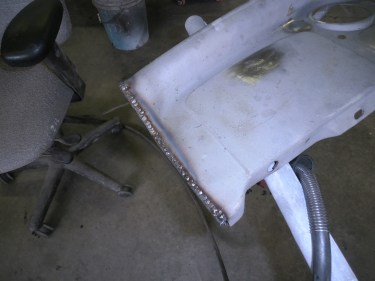
Sometimes the old mounting points have so deteriorated as to require a little structural reinforcement. Ralph adds new metal and grinds away the excess. It might seem simple but hanging a hot rod door is excruciatingly difficult to get right and continuously even door gaps will be the ultimate standard by which success is measured.
The lower body reveal is also in need of work to correct its bulge created by a patch panel that was overlapped in its installation.
A gap was created at the bottom of the door opening when the patch panel on the lower section of the quarter-panel was repaired. The gap is effectively filled after grinding down the welds.

Fine-tuning the precise placement and alignment of the hinges and latches is done when the rest of the quarter panel and bottom reveal are finished.
And, finally, an old door re-hung correctly. When you come along for a ride, you’ll be swinging this one open and marveling at how nice it looks and how well it functions.
A long time elapsed between the initial trial fitting or “hanging” of the doors on the pickup cab, and the final fitting on March 24, 2018. Why the long interval?
Well it is not because we weren’t busy. I say “we” loosely here and don’t wish to imply that I have had a direct role in the physical or even in the intellectual part of this build. Don’t be deceived here. There is a lot of math and engineering that goes into this. I would liked to have been more directly involved in a “hands-on” sense but my assignment in Geneva made that impossible. But I was also more than a passive observer. Ralph checks in with me on nearly every step.
There are several things that we observe in this photo.
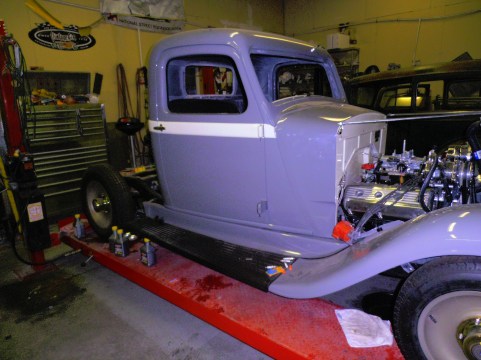
Of course the stripe that covers the reveal on the door and around the entire cab has been painted in the contrast color, an off white that is technically “pepper white” from the BMW mini. It isn’t on the cowl because that part will be covered by the hood and the stripe is on the hood.
But there is also a lot more to see here as the splash aprons, running boards, dual exhaust outlets, wheels and specially machined hub caps are all visible. The engine is sporting its new valve covers. Not visible here is the oil pan. At this particular time in the build the original pan has been discarded due to a leak not visible at first. A new custom made aluminum pan has been ordered and is at the powder coater when this photo was taken.
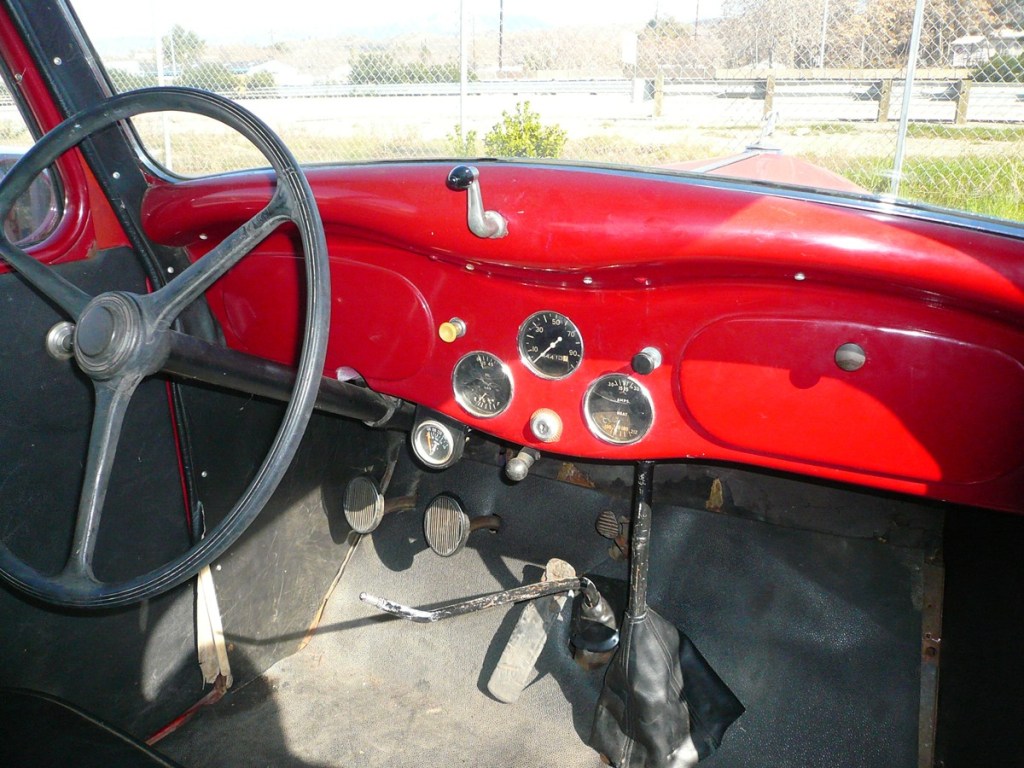
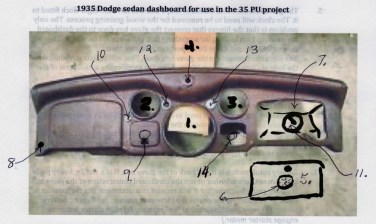
 35 Dodge pickup—not mine but a good one. It shows some factory design effort to please the eye but is frankly quite utilitarian. And that’s generally okay with pickup owners. However, that very same year Dodge had a more visually pleasing dash for buyers of its upscale sedan models. I found one.
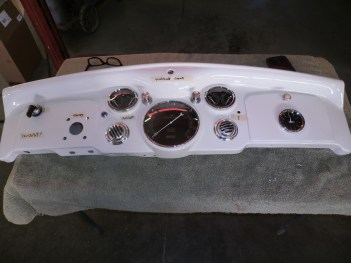
 This was more like it and I decided to jettison the original dashboard in favor of something with more “dash” and “flare”. I had scoured the country for a Dodge sedan dashboard. This is quite easily done online. I found a parts yard (we used to call them “junk” yards) that had acres of mostly Dodge, DeSoto, Chrysler and Plymouth cars. A sedan dashboard in good shape was on offer. There was no glove box door but I reasoned I could find one elsewhere. And eventually I did, albeit with some difficulty and for a princely sum.
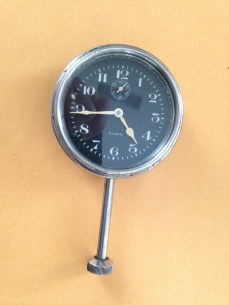

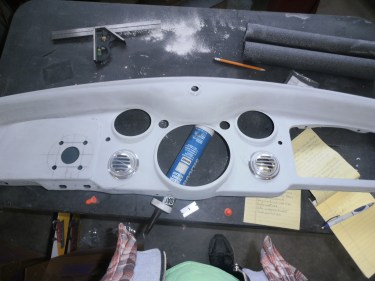
 A few months after the above photo with the new dashboard tacked in place, we turned attention briefly to whether the dashboard should receive a wood grain treatment or be painted. I once had a chrome dashboard in a ’32 Ford–bad idea. The glare from the sun nearly blinded me on several occasions. So chrome was out but what about a modern wood grain application? As the wood grain application is basically a decal we gave that a trial run. I liked the off white color much better.
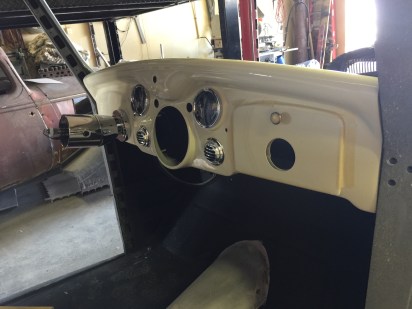
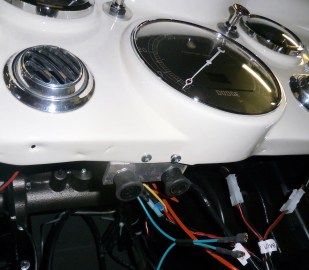
 complete. Notice that the steering column runs through the dash, not below it. We are using a “Steer Clear” chain device that allows a more horizontal path for the steering column. The windshield crank is also now visible as is the ignition switch to the far left. The two AC vents are functional and both heat and cool air will enter the cab through the dash. The glovebox is not functional although it was originally. We had to seal it as there is no room behind it for a box of any useful depth.