You have a few options when it comes time to decide what you’re going to use for a seat in your hot rod pickup. I could have tried to resurrect my original seat but the rusty old pickup didn’t come with one. I could scrounge the wrecking yards looking for something close and then modify it to fit my ’35 Dodge. I could buy nice new seats from one of the companies advertising in Street Rodder magazine. Or I could ask Ralph to build them from scratch. I didn’t do any of these but here’s what I did.
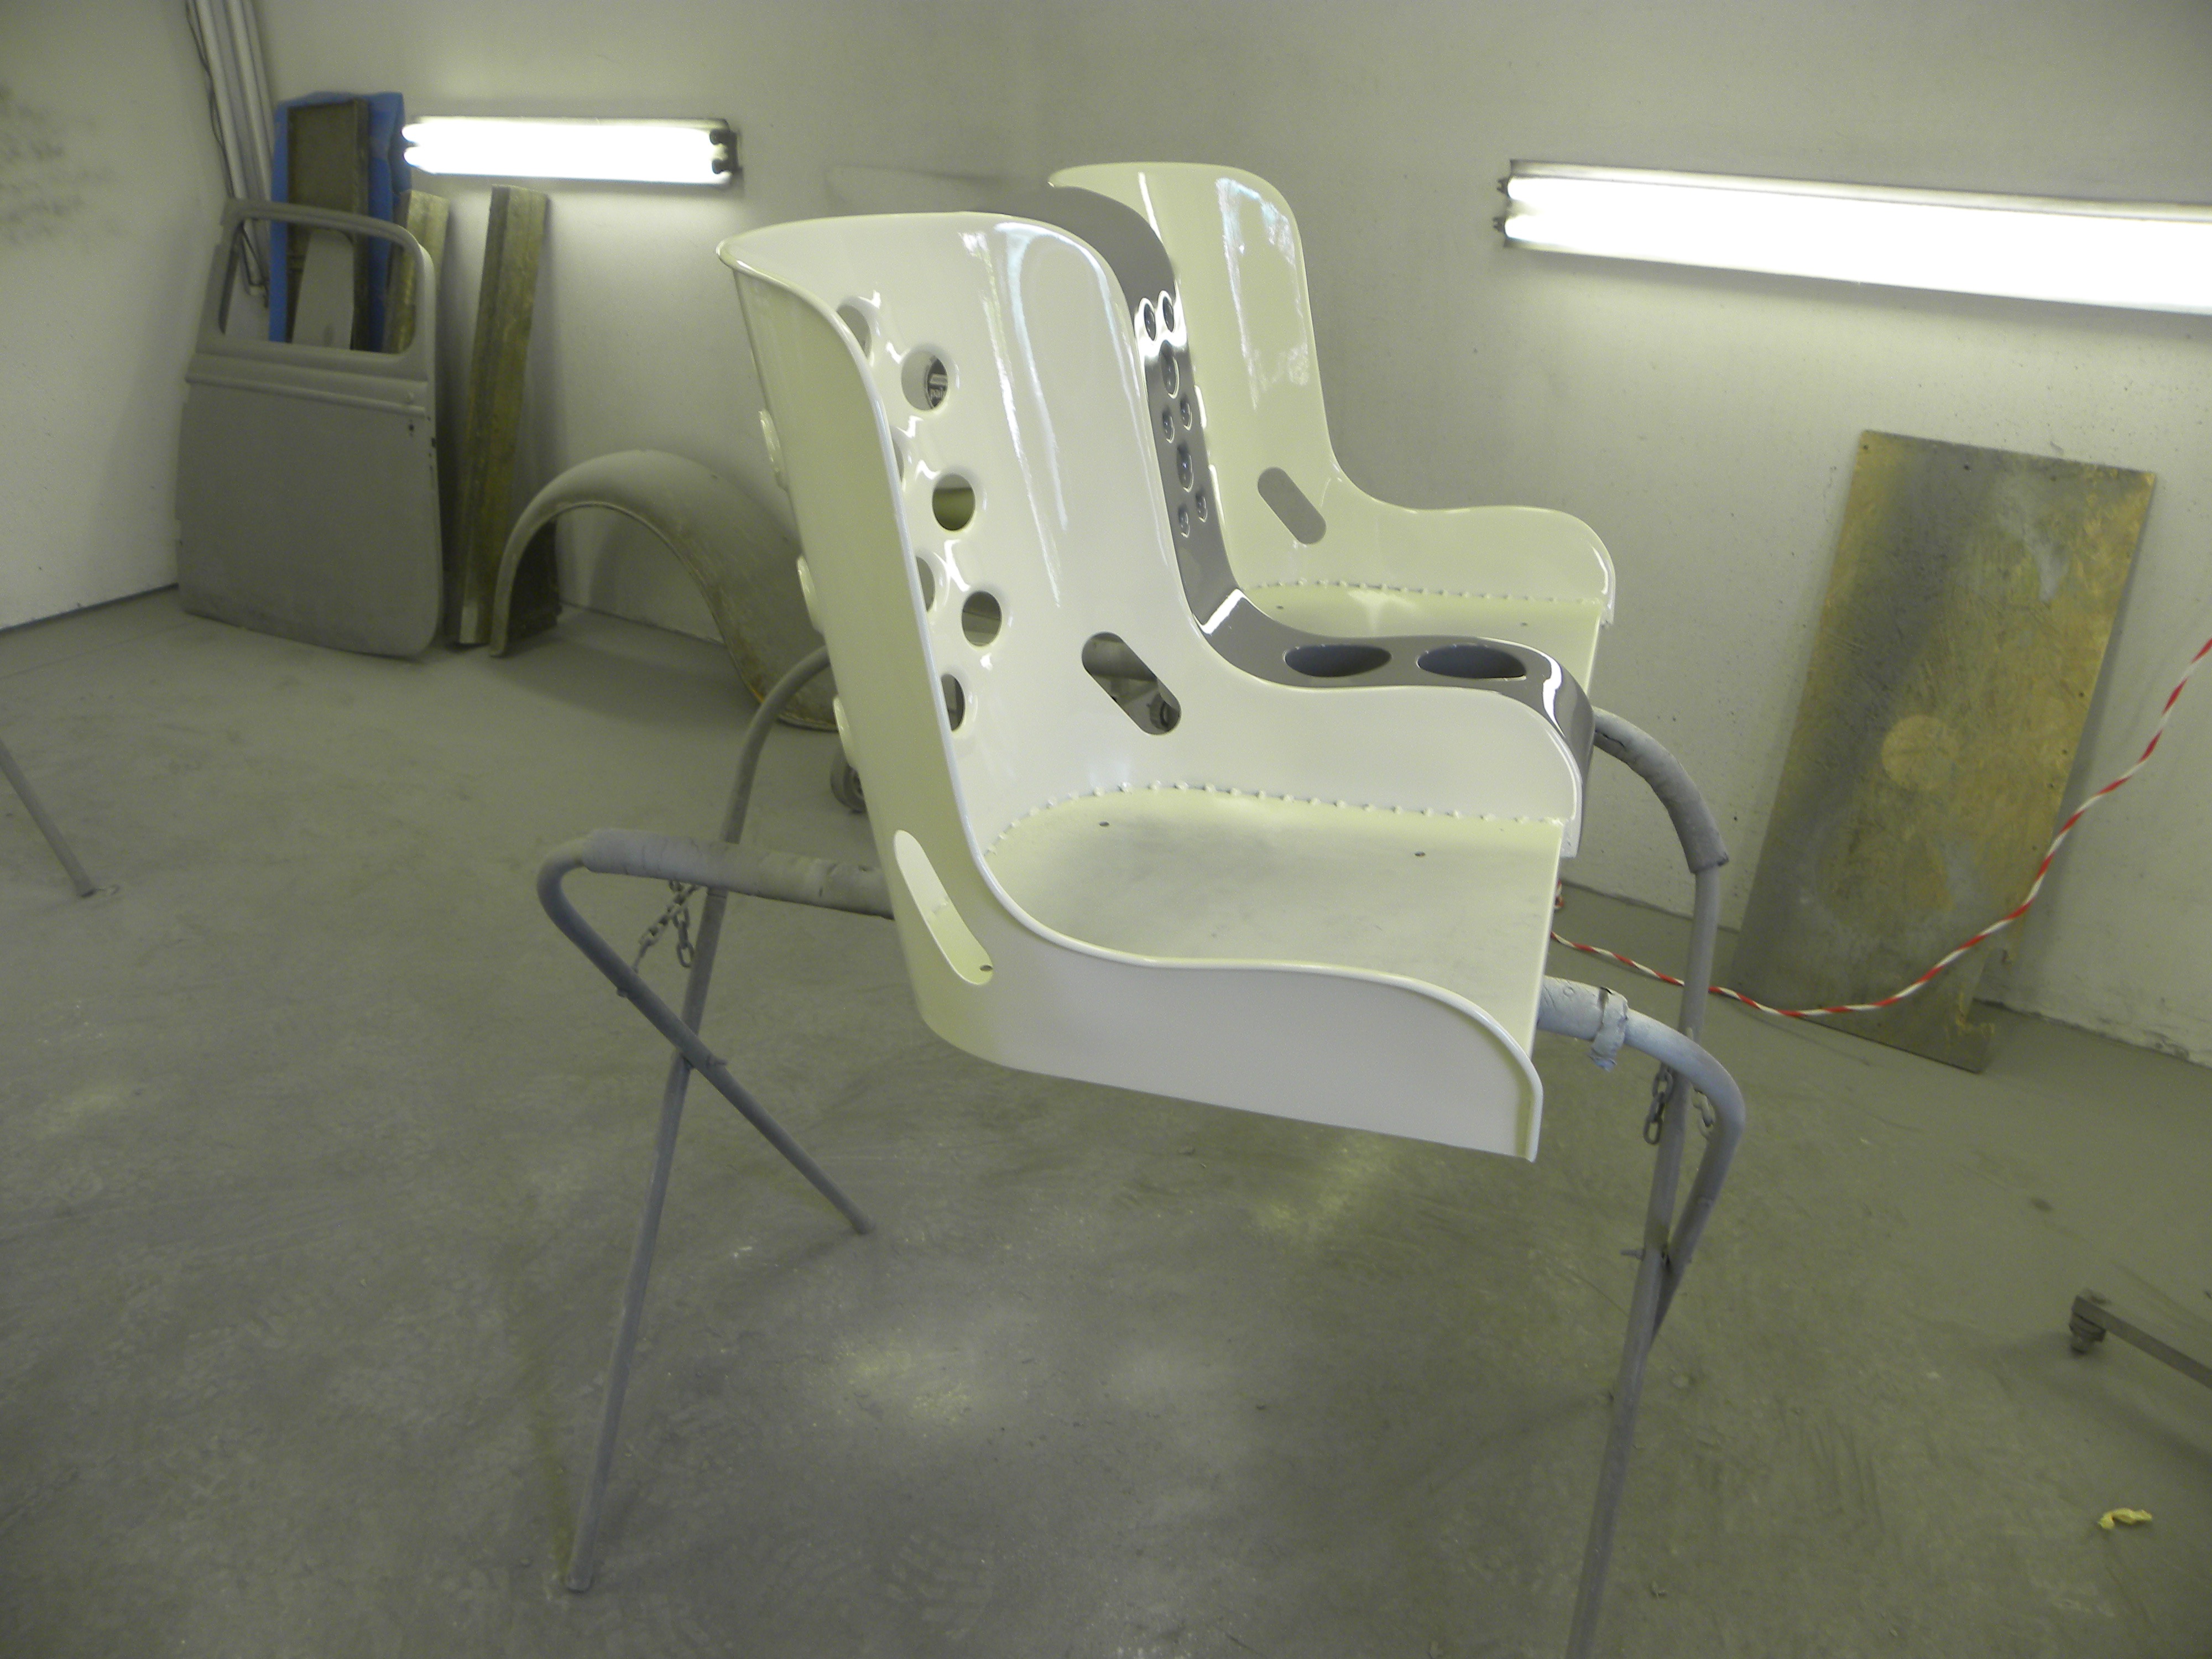
Bomber-style seats have been used in street rods since the ’40s, and “back in the day” most of these came from military surplus yards. Lately, these seats have become enormously popular, and now we are seeing a lot of newly constructed bomber seats in hot rods.

I thought about this photo from Street Rodder when I found some almost identical ones on eBay. They were advertised as being made of an unknown, lightweight composite metal material. They were said to be rare. The seller claimed perfect condition. I bought them like most everything else, “sight unseen.”
I thought these would look cool in the Dodge. And they should fit inside the cramped pickup quarters, they were lightweight, and they would give the custom pickup a purpose-built look with an aircraft flavor.
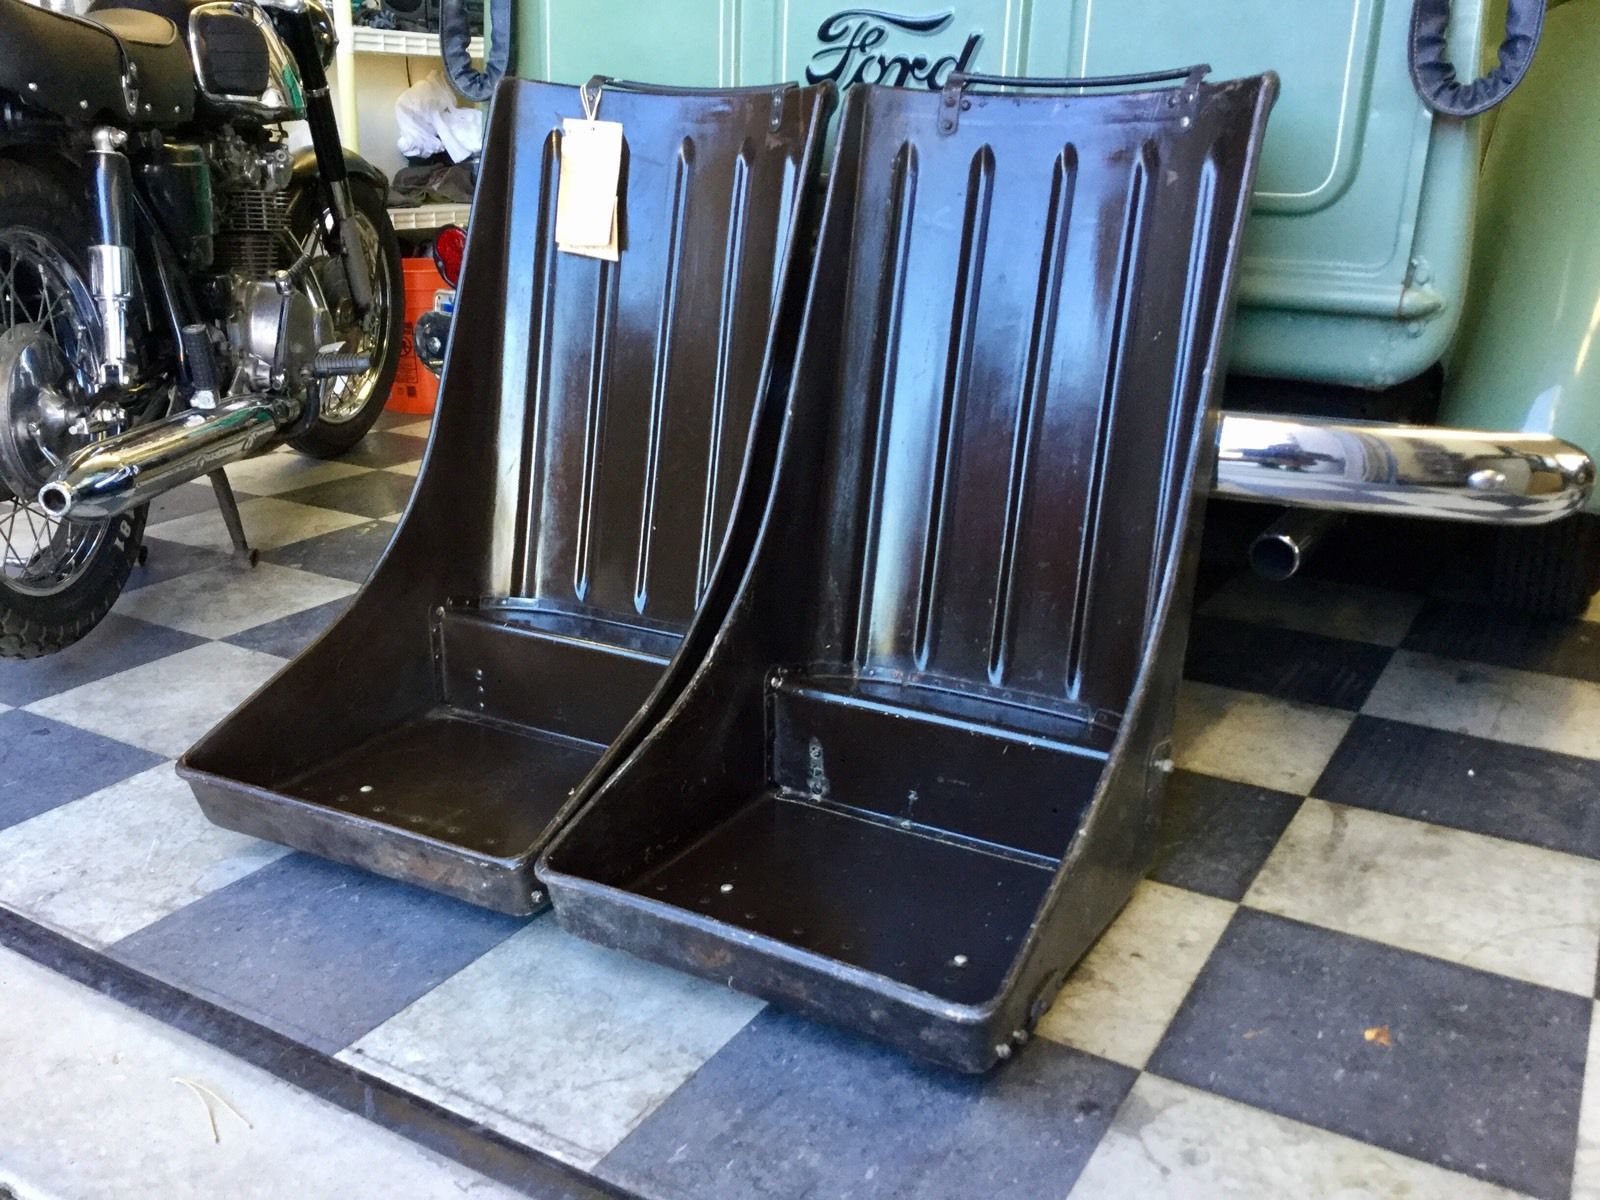
Most true aircraft seats are riveted together and these are. I get both straight lines and one graceful curve and that’s okay as the old truck has lots of straight pieces with the dashboard being a visibly curvey exception. The rivets aren’t especially visible when the cushions are in place but no one will mistake these seats for factory originals or custom made replicas.
The composite material from which the seats are made undoubtedly was meant to shave off valuable weight. The weight issue is not so important for a street-driven car, but still, I really like the look of these genuine aircraft seats.
I didn’t chop or channel this pickup so the interior dimensions remain true to original factory specs. But early pickups were designed for work, not driver comfort and there is not a lot of room in the cab, in any direction. This is relevant when thinking of the cushions.
The seat height could be somewhat variable because of built in adjustments provide by the seat riser that connects the seat to the floor. I wanted the seats to be comfortable as well as adding to the allure of the truck. I decided to use canvas seating material similar to that found in military aircraft. I just ordered heavy duty, military canvas. I had a 12 foot square piece sent to the upholstery shop.
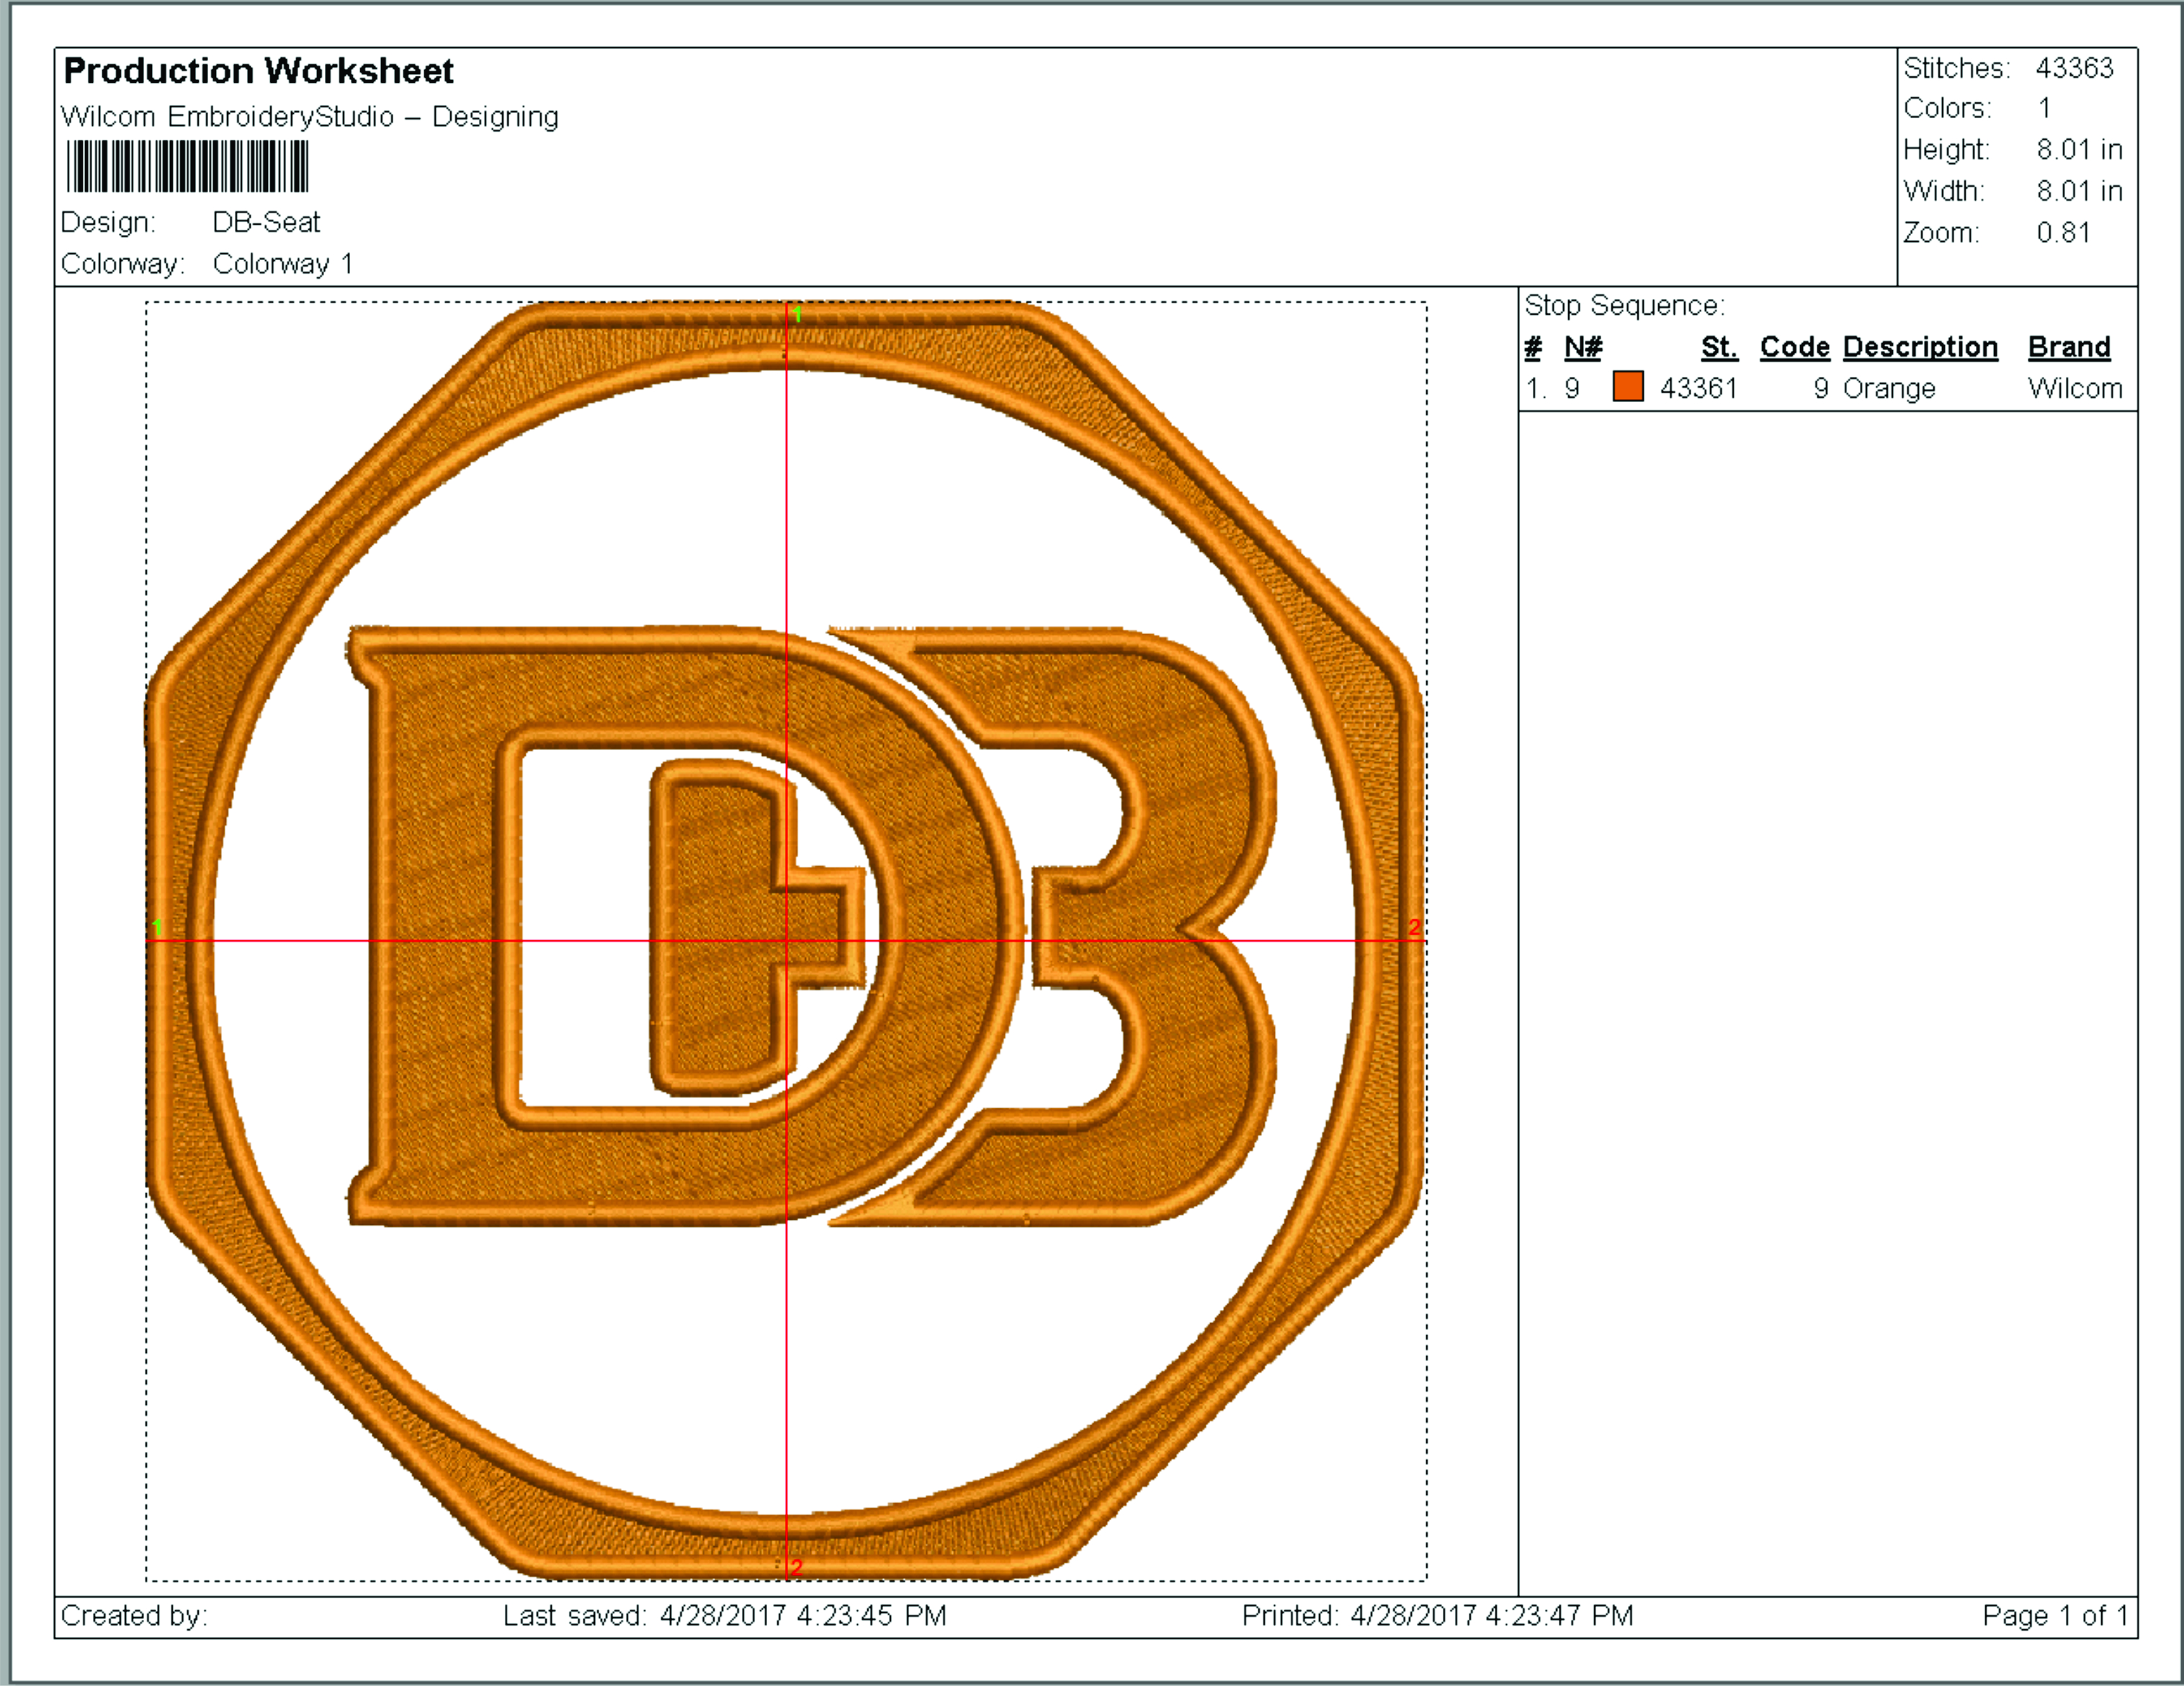
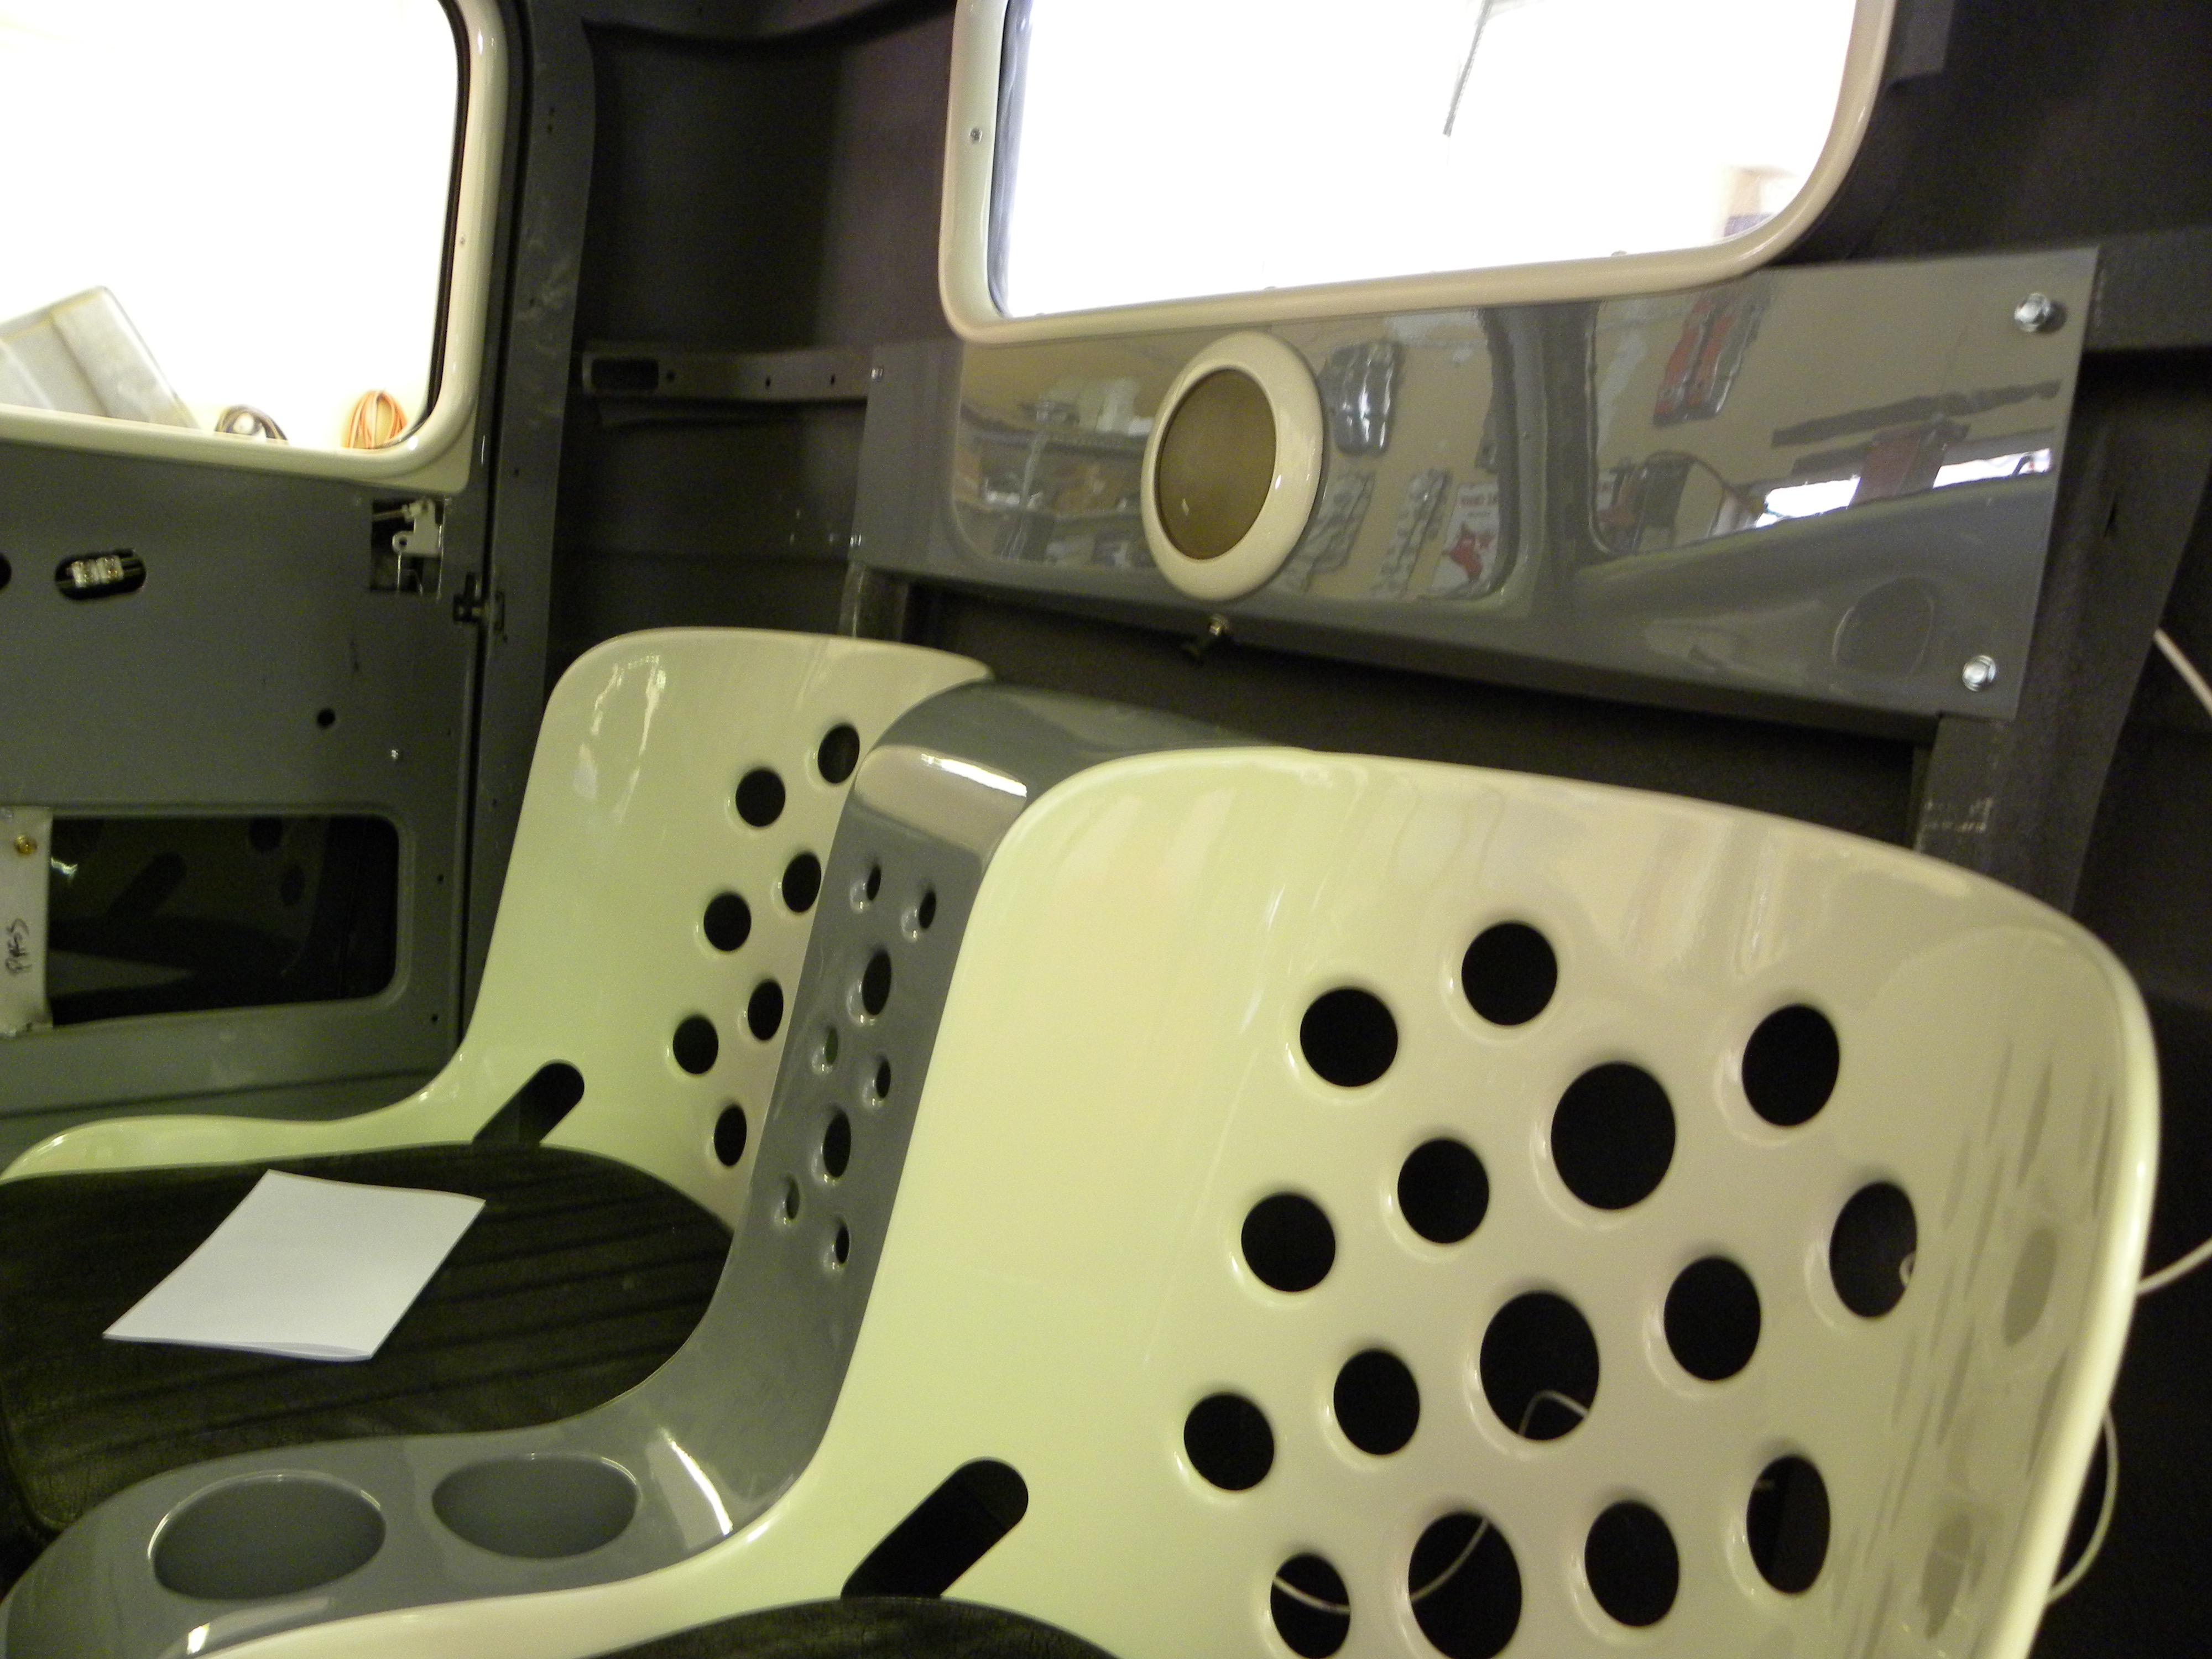
I added the Dodge Brothers logo courtesy of a very hi-tech embroidery shop in Reno.
The upholstery shop I selected to make the cushions was located not far from the guy who sold me the seats and was happy to deliver the seats to the upholstery shop. I said I wanted the cushions to be thick and of the highest density foam available. I haven’t sat on these yet but they look thick and heavy-duty. All the stitching was done, as requested, in “French” double stitch style. The upholsterer, in turn, took my heavy canvas material to the embroidery shop. Great collaboration among these three made this three-step process easy for me to manage at a great distance from the action.

I am pleased with the way the Dodge Brothers logo turned out. May also stand for Donald Bruce, my given names. I know this sort of stuff isn’t for everyone. But I kept it subtle by having the embroidery done in the same color as the canvas.
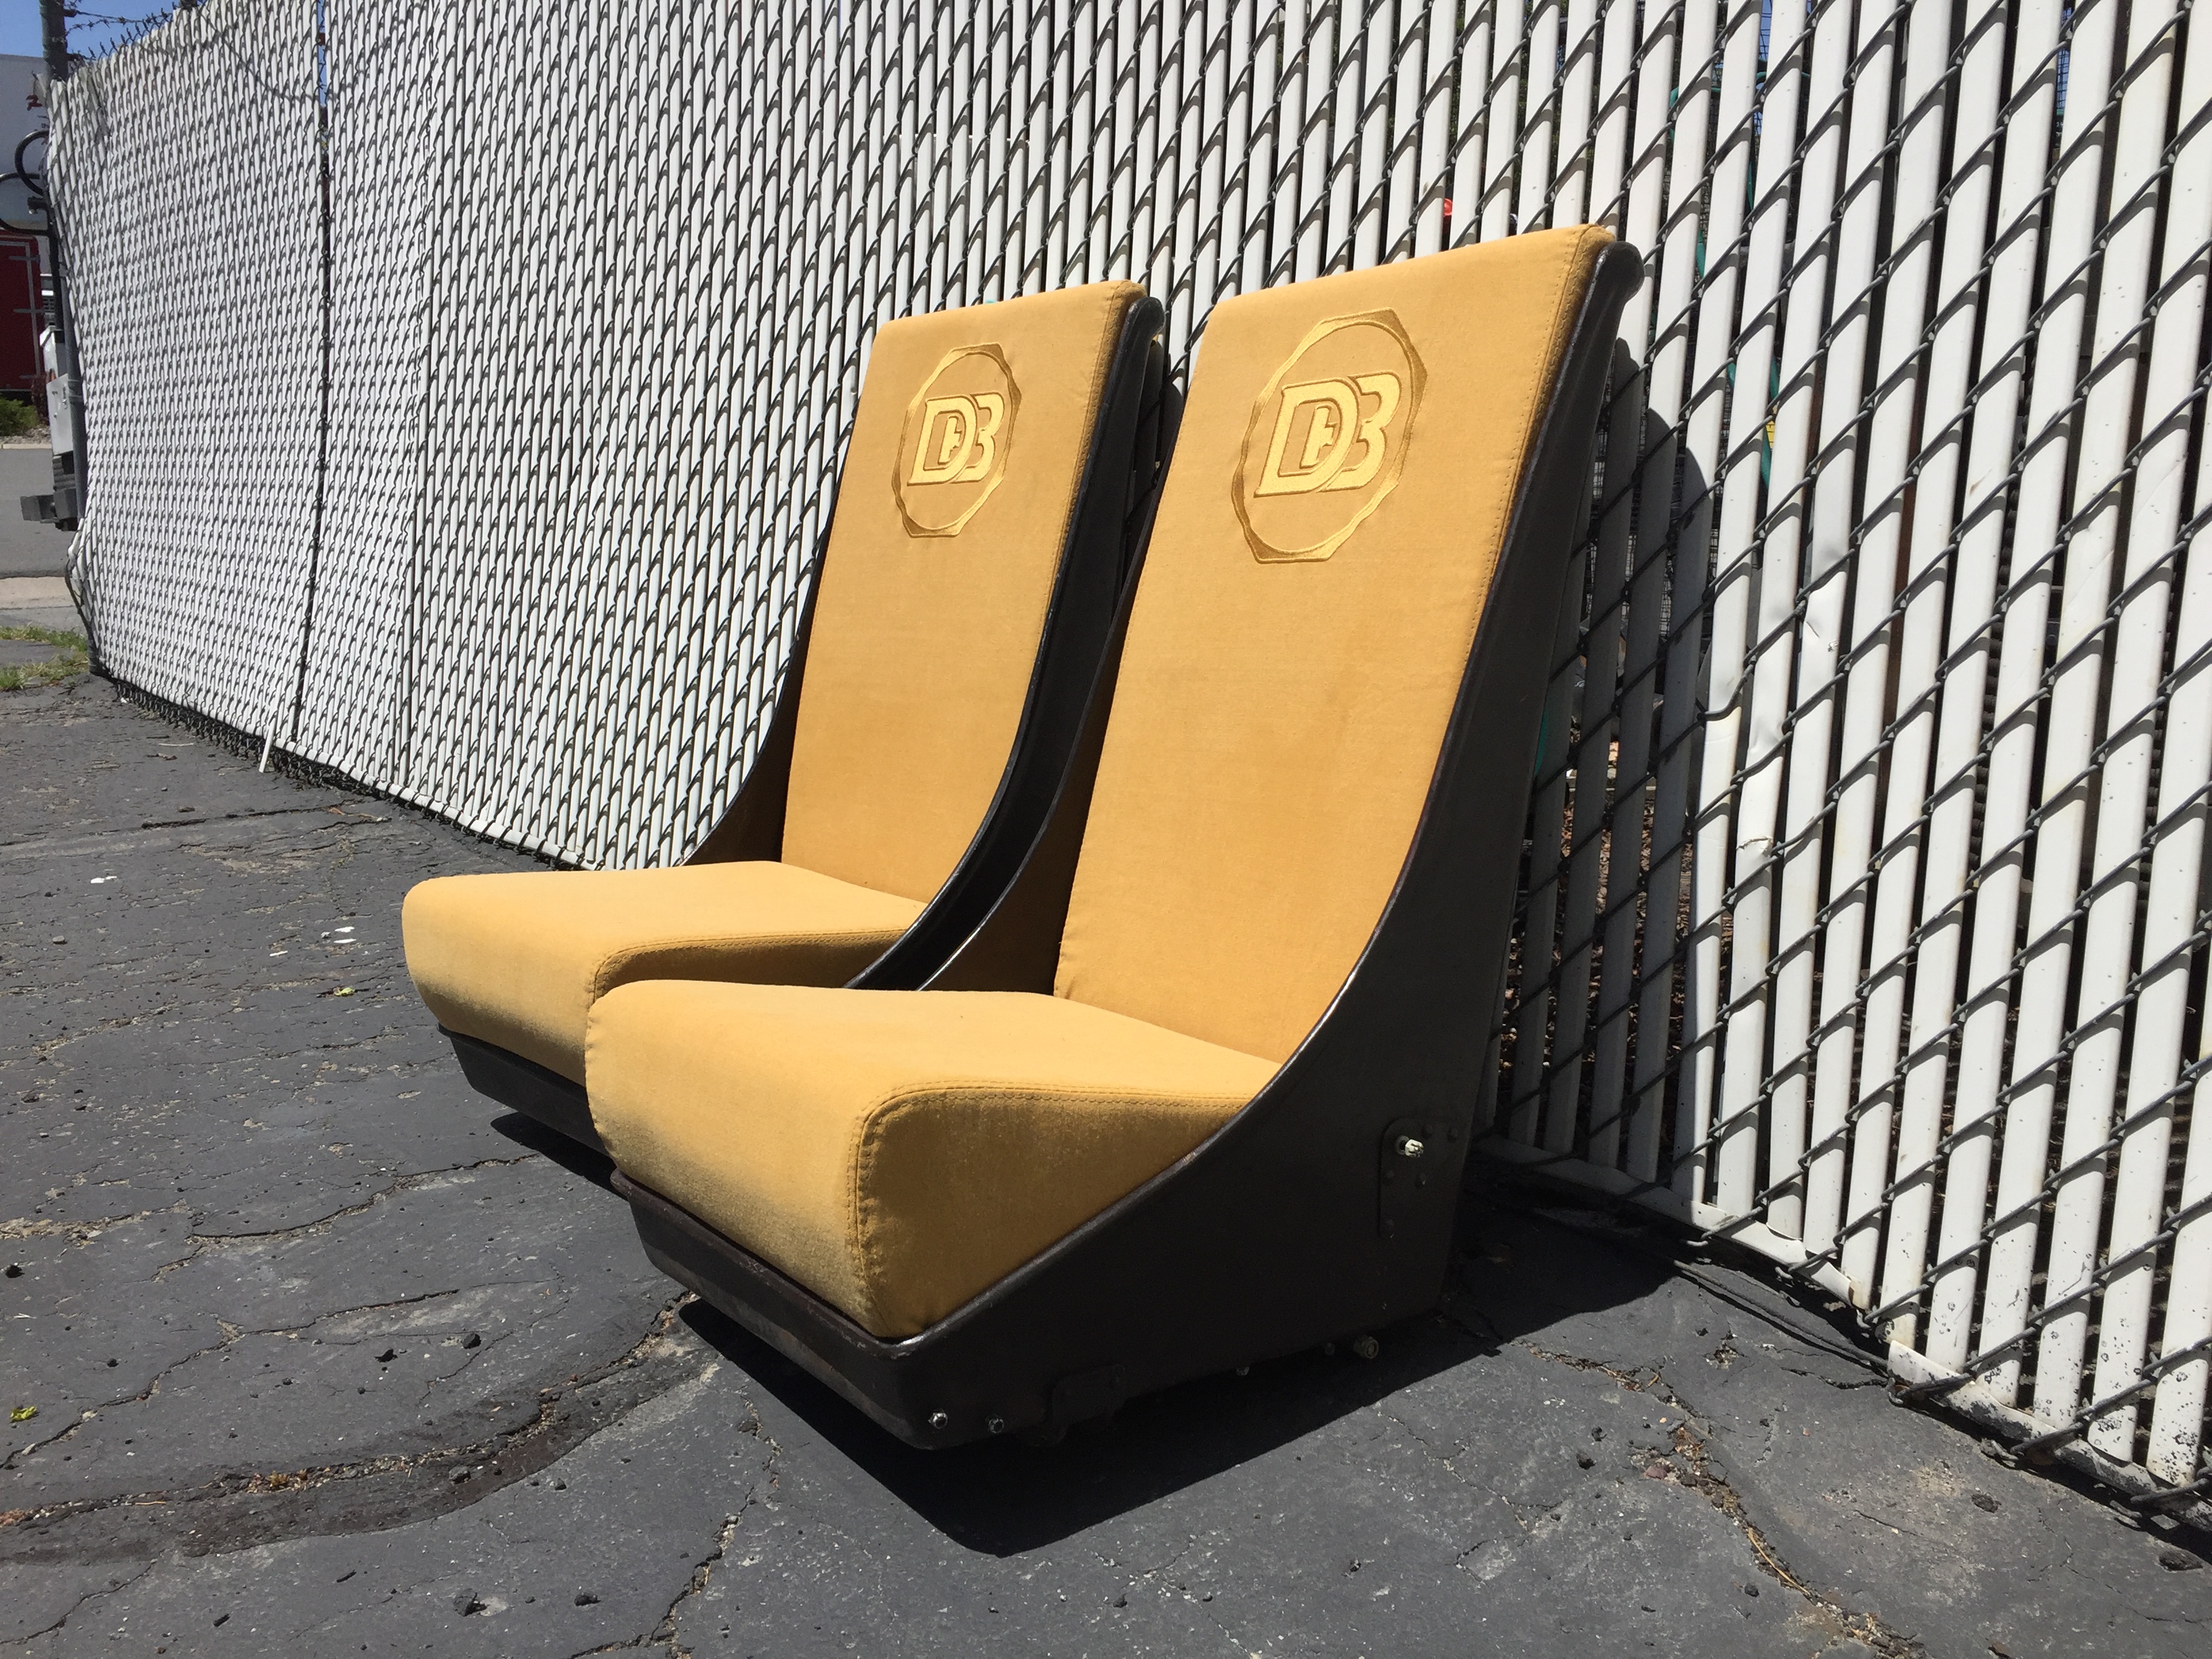
Here is a good side view of the seats sporting their new cushions. I think the military aircraft look is preserved and the cushions cover up all the hard bits.
We can adjust the seat height about two and a half inches up and down and fore and aft. These commercially available risers make easy work out of what used to be a complicated trial and error, one-off metal craftsman’s job. 
I spend a lot of time and money planning this pickup project. Ralph spends a lot more time building it. So, in addition to choosing mechanical components, dress up items, paint colors, seats and so on, a good set of seatbelts shouldn’t end up being an afterthought.
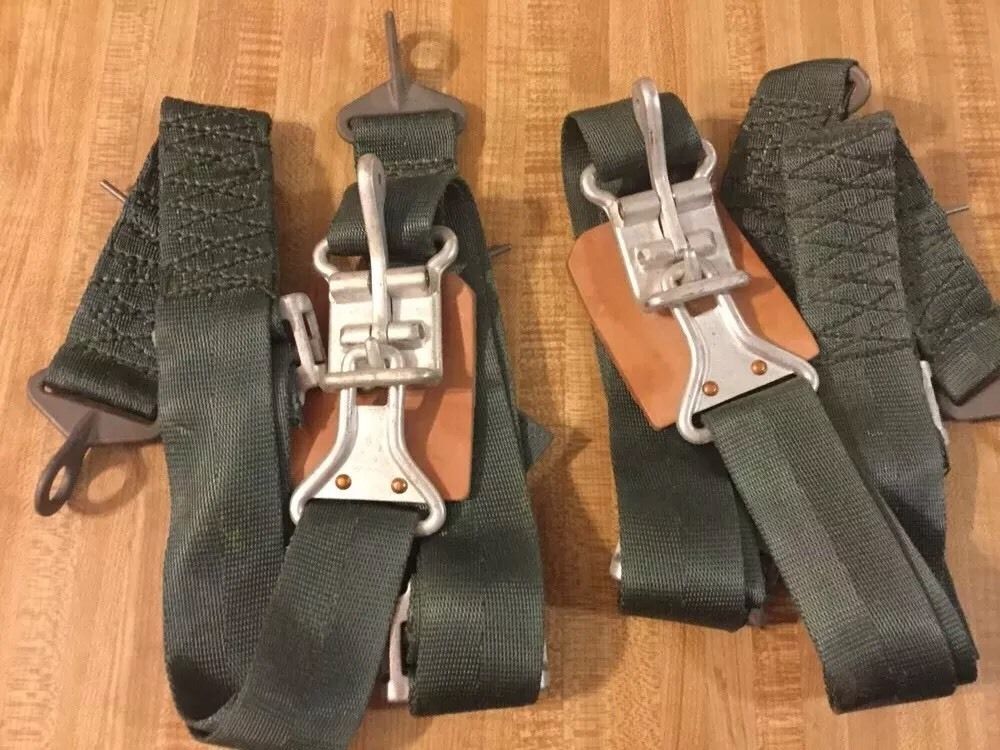
Along with good looks and wow-factor, safety should be up there near the top of the list since this pickup is destined to carry friends, spouse, and our children and grandchildren. These aircraft quality seat belts should do the job. They look good too and will match the theme of the seats.
Update as of September 15, 2017. Despite my best intentions, I have had to accept the fact that these seats will not work. There just wasn’t room inside the tiny cab of the pickup for both me and this seat. Or, me on this seat when the seat was provisionally installed in the cab. What a colossal bummer! And this despite my newly acquired svelte profile. Let’s don’t dwell on this topic. Okay, into each hot rod project a little rain must fall. That’s just how it is. But the tears have been wiped away and I’ve moved on. I’ll be posting a blog called “reseating” or similar very soon.
I sold the airplane seats and canvas on eBay. What a bummer. But if you are easily discouraged by setbacks then hot rod building isn’t for you. This is a custom one-off machine. There is no guidance and despite the substantial experience shared between Ralph and me, mistakes are made. I take responsibility for this one.
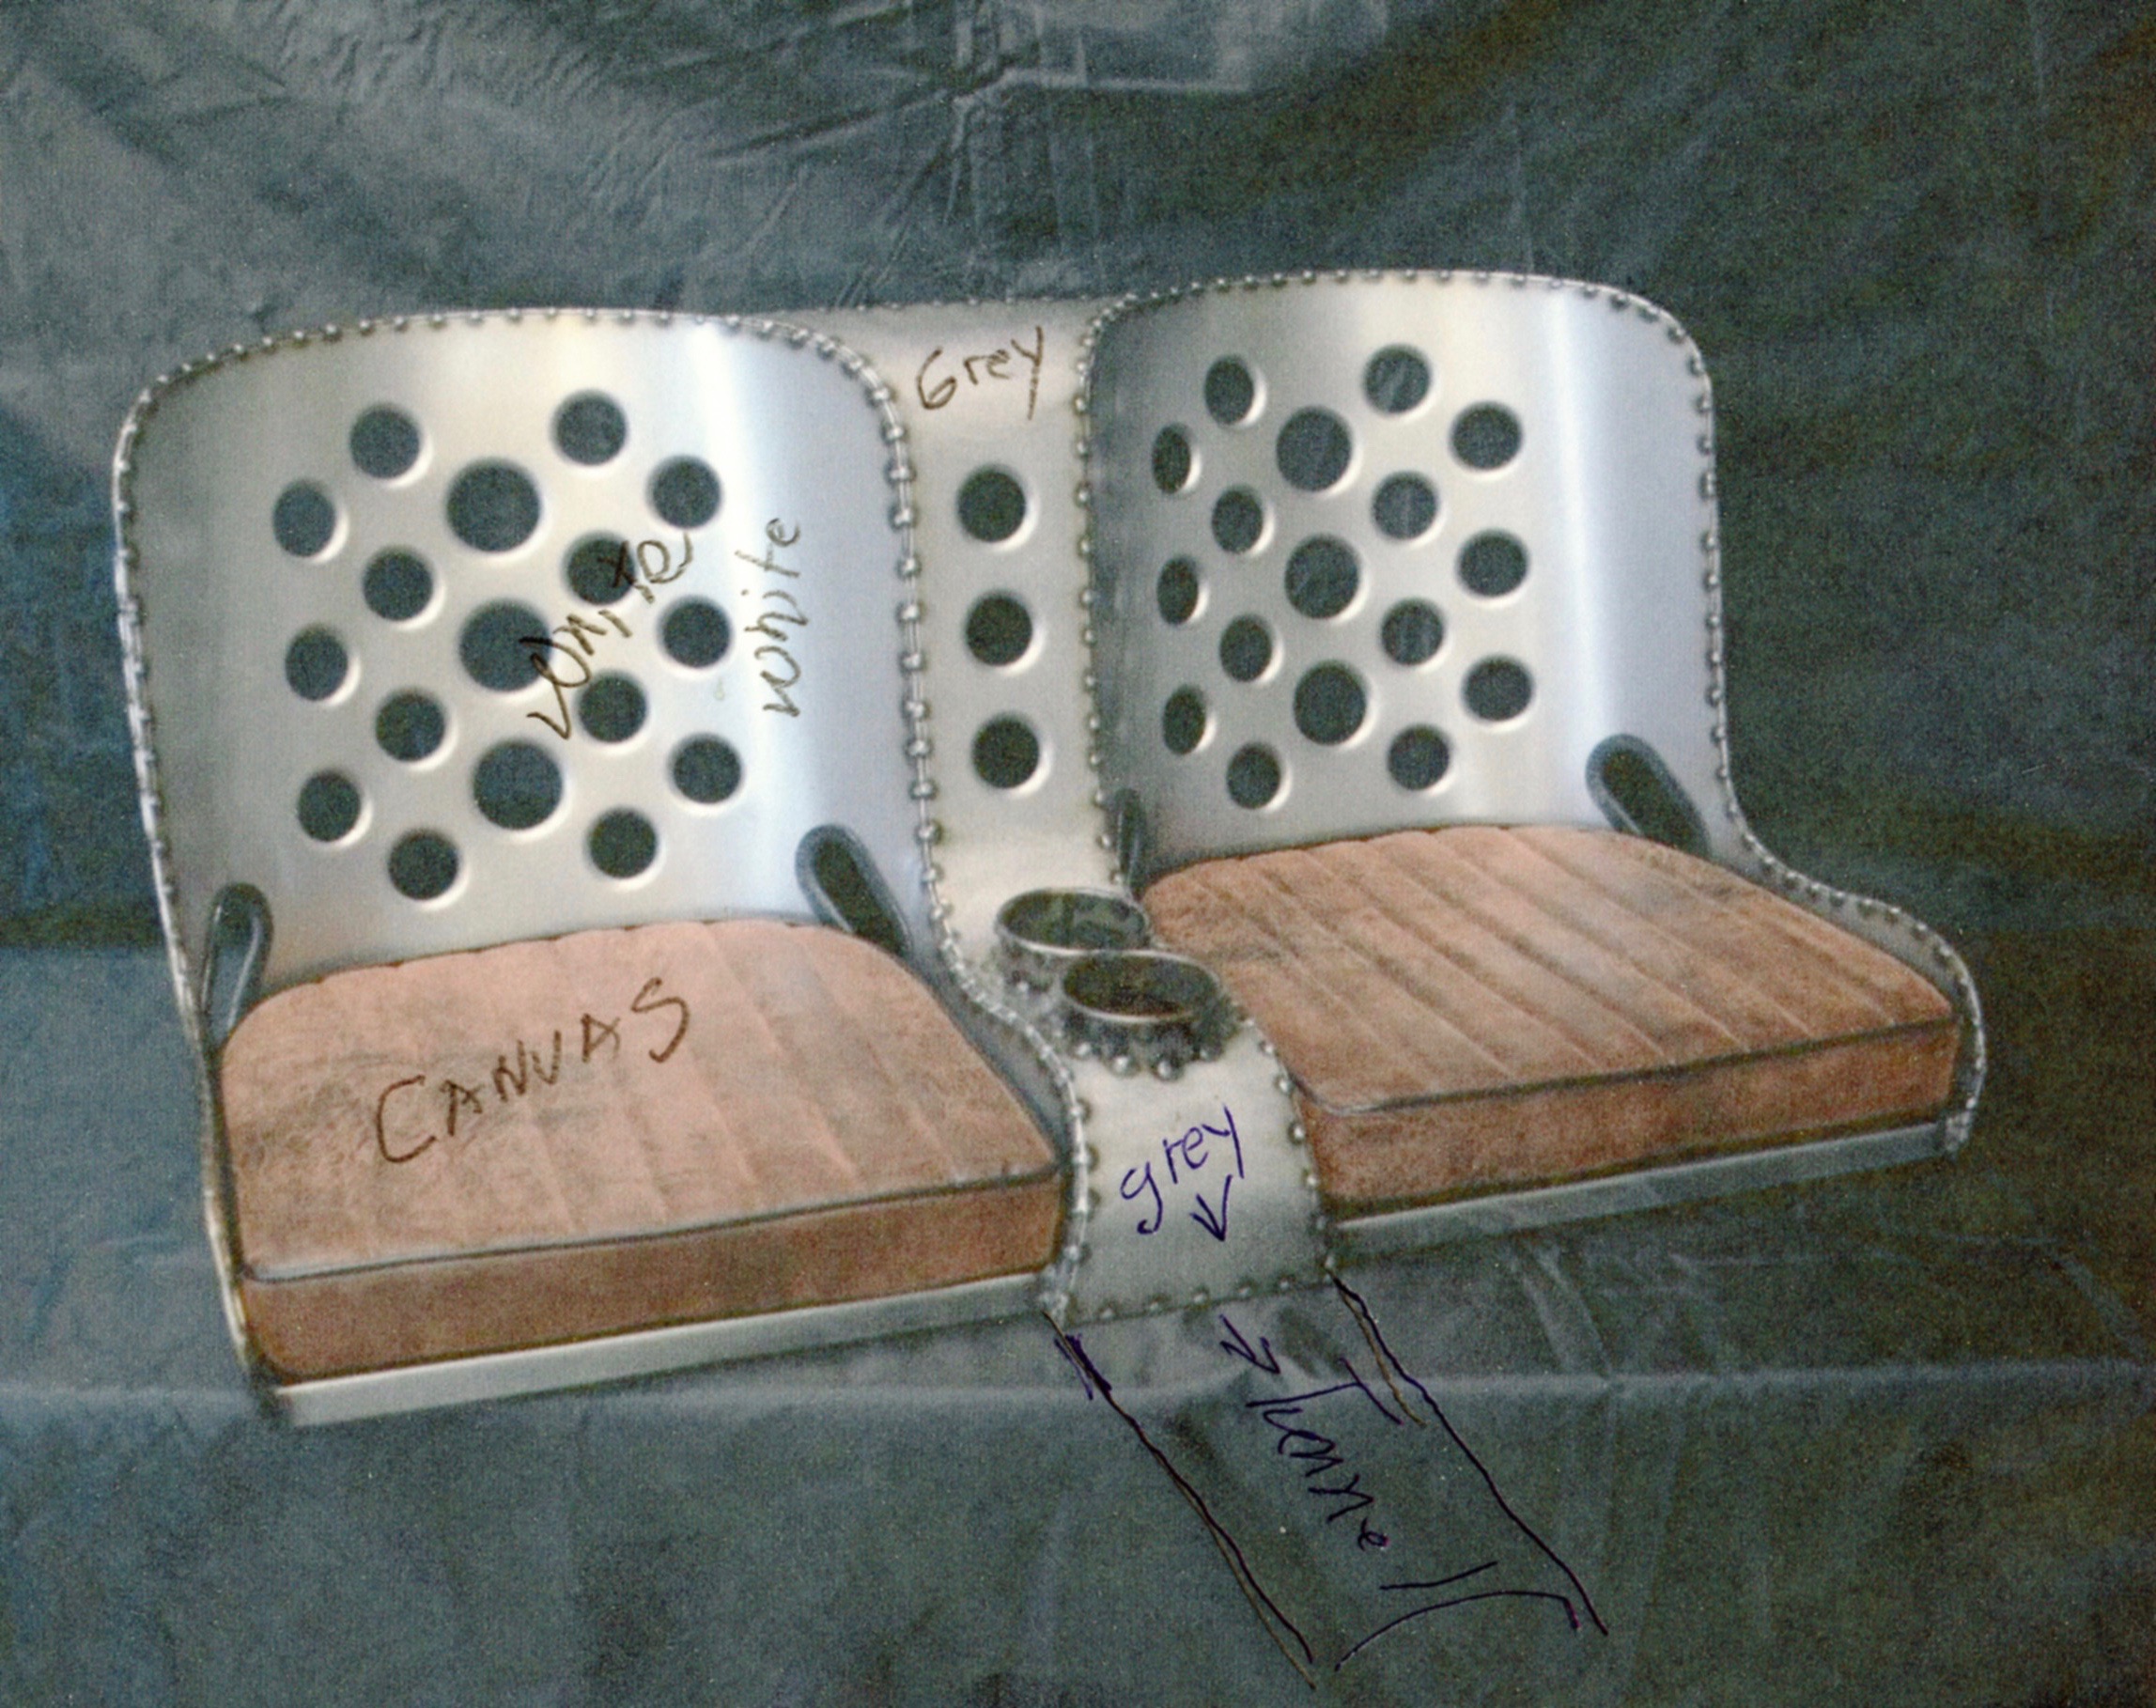
So why this seat? There are a couple of reasons. The most important one is that it picks up about four inches of much-needed space between the back of the cab and the steering wheel. It does that by offering no back padding at all and by not reclining much.
But I am not satisfied with the way it looks. I offended the fabricator (inadvertently, of course) by asking for a different kind of weld. “I like the stacked dime look of one continuous seam.” He said, “Well you know this spot weld with the little burn marks is sort of my trademark.” Hmmm…. So I am going to have the seats rewelded. It will give it a very different look. And the seat will be painted as shown in the diagram. Not sure what to do with the canvas “airplane” theme. I need to take this one step at a time.
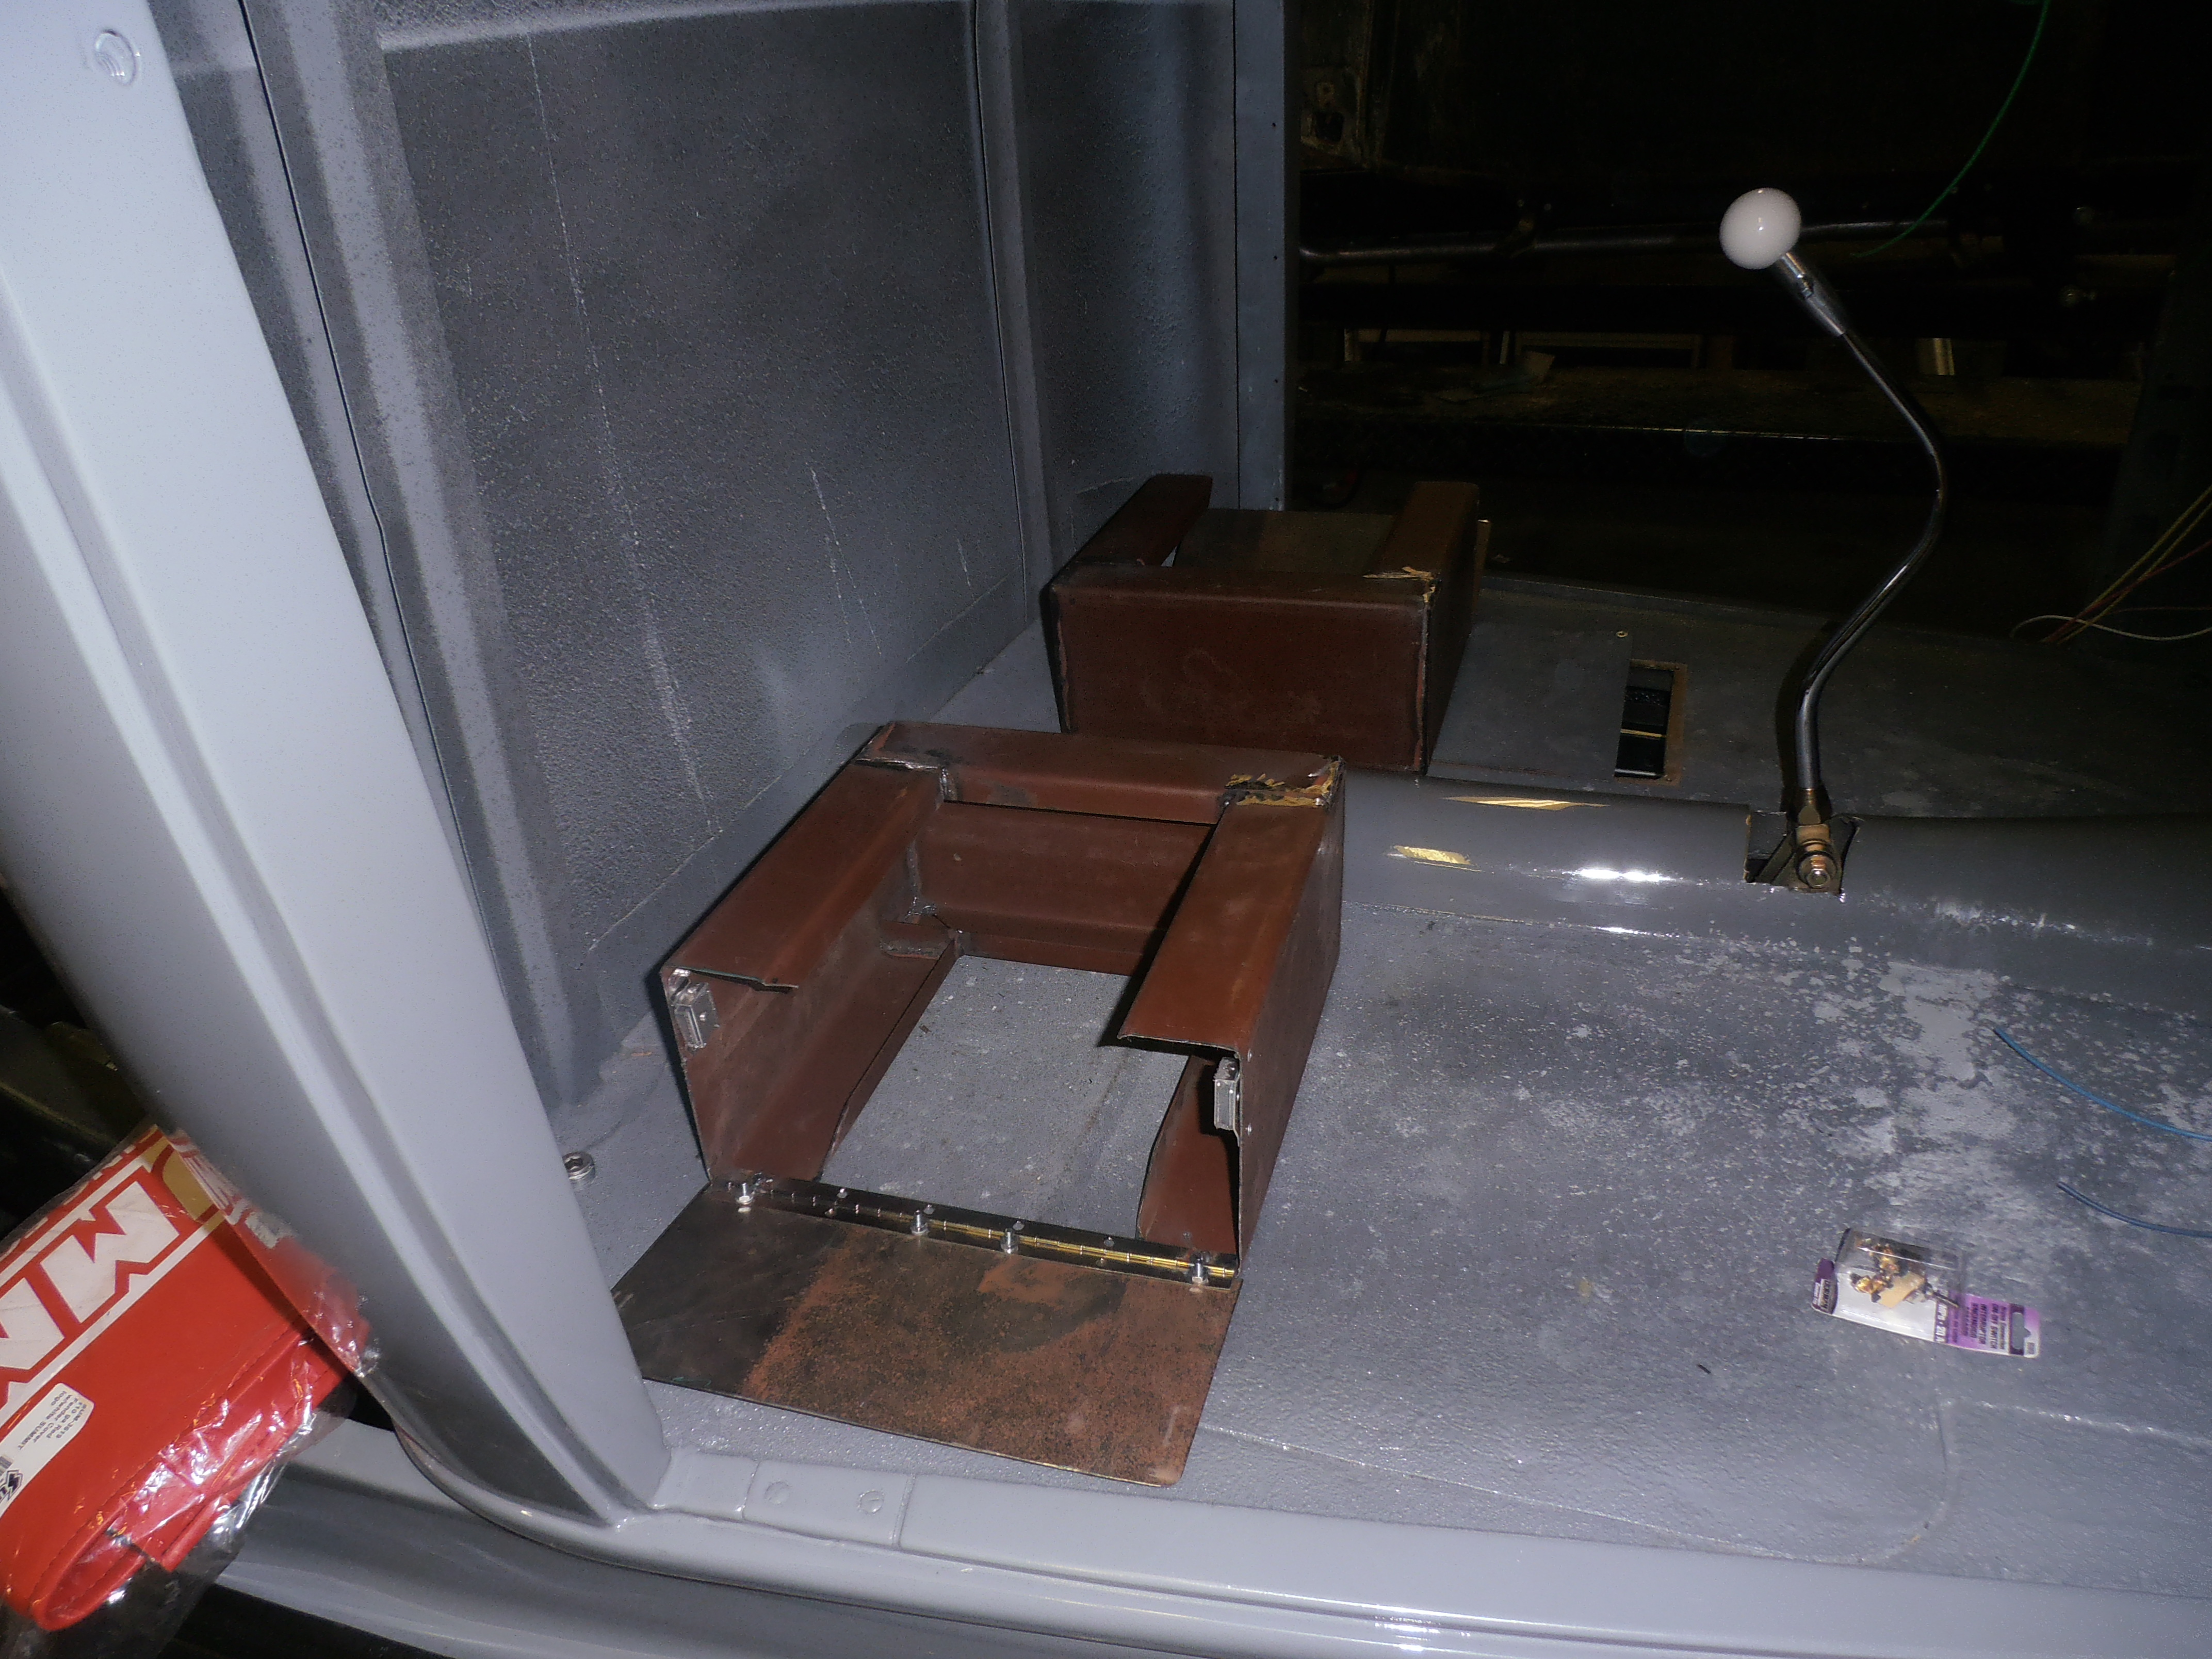
Meantime, as work on the cab progresses (February 2018), Ralph has fabricated 6″ seat risers. These will be either welded or bolted to the floor. If you look closely, there is a hinged door that can be accessed on the side making this under-seat space usable as a “glove box.” We lost the dash glovebox to the AC unit that needed that particular space.
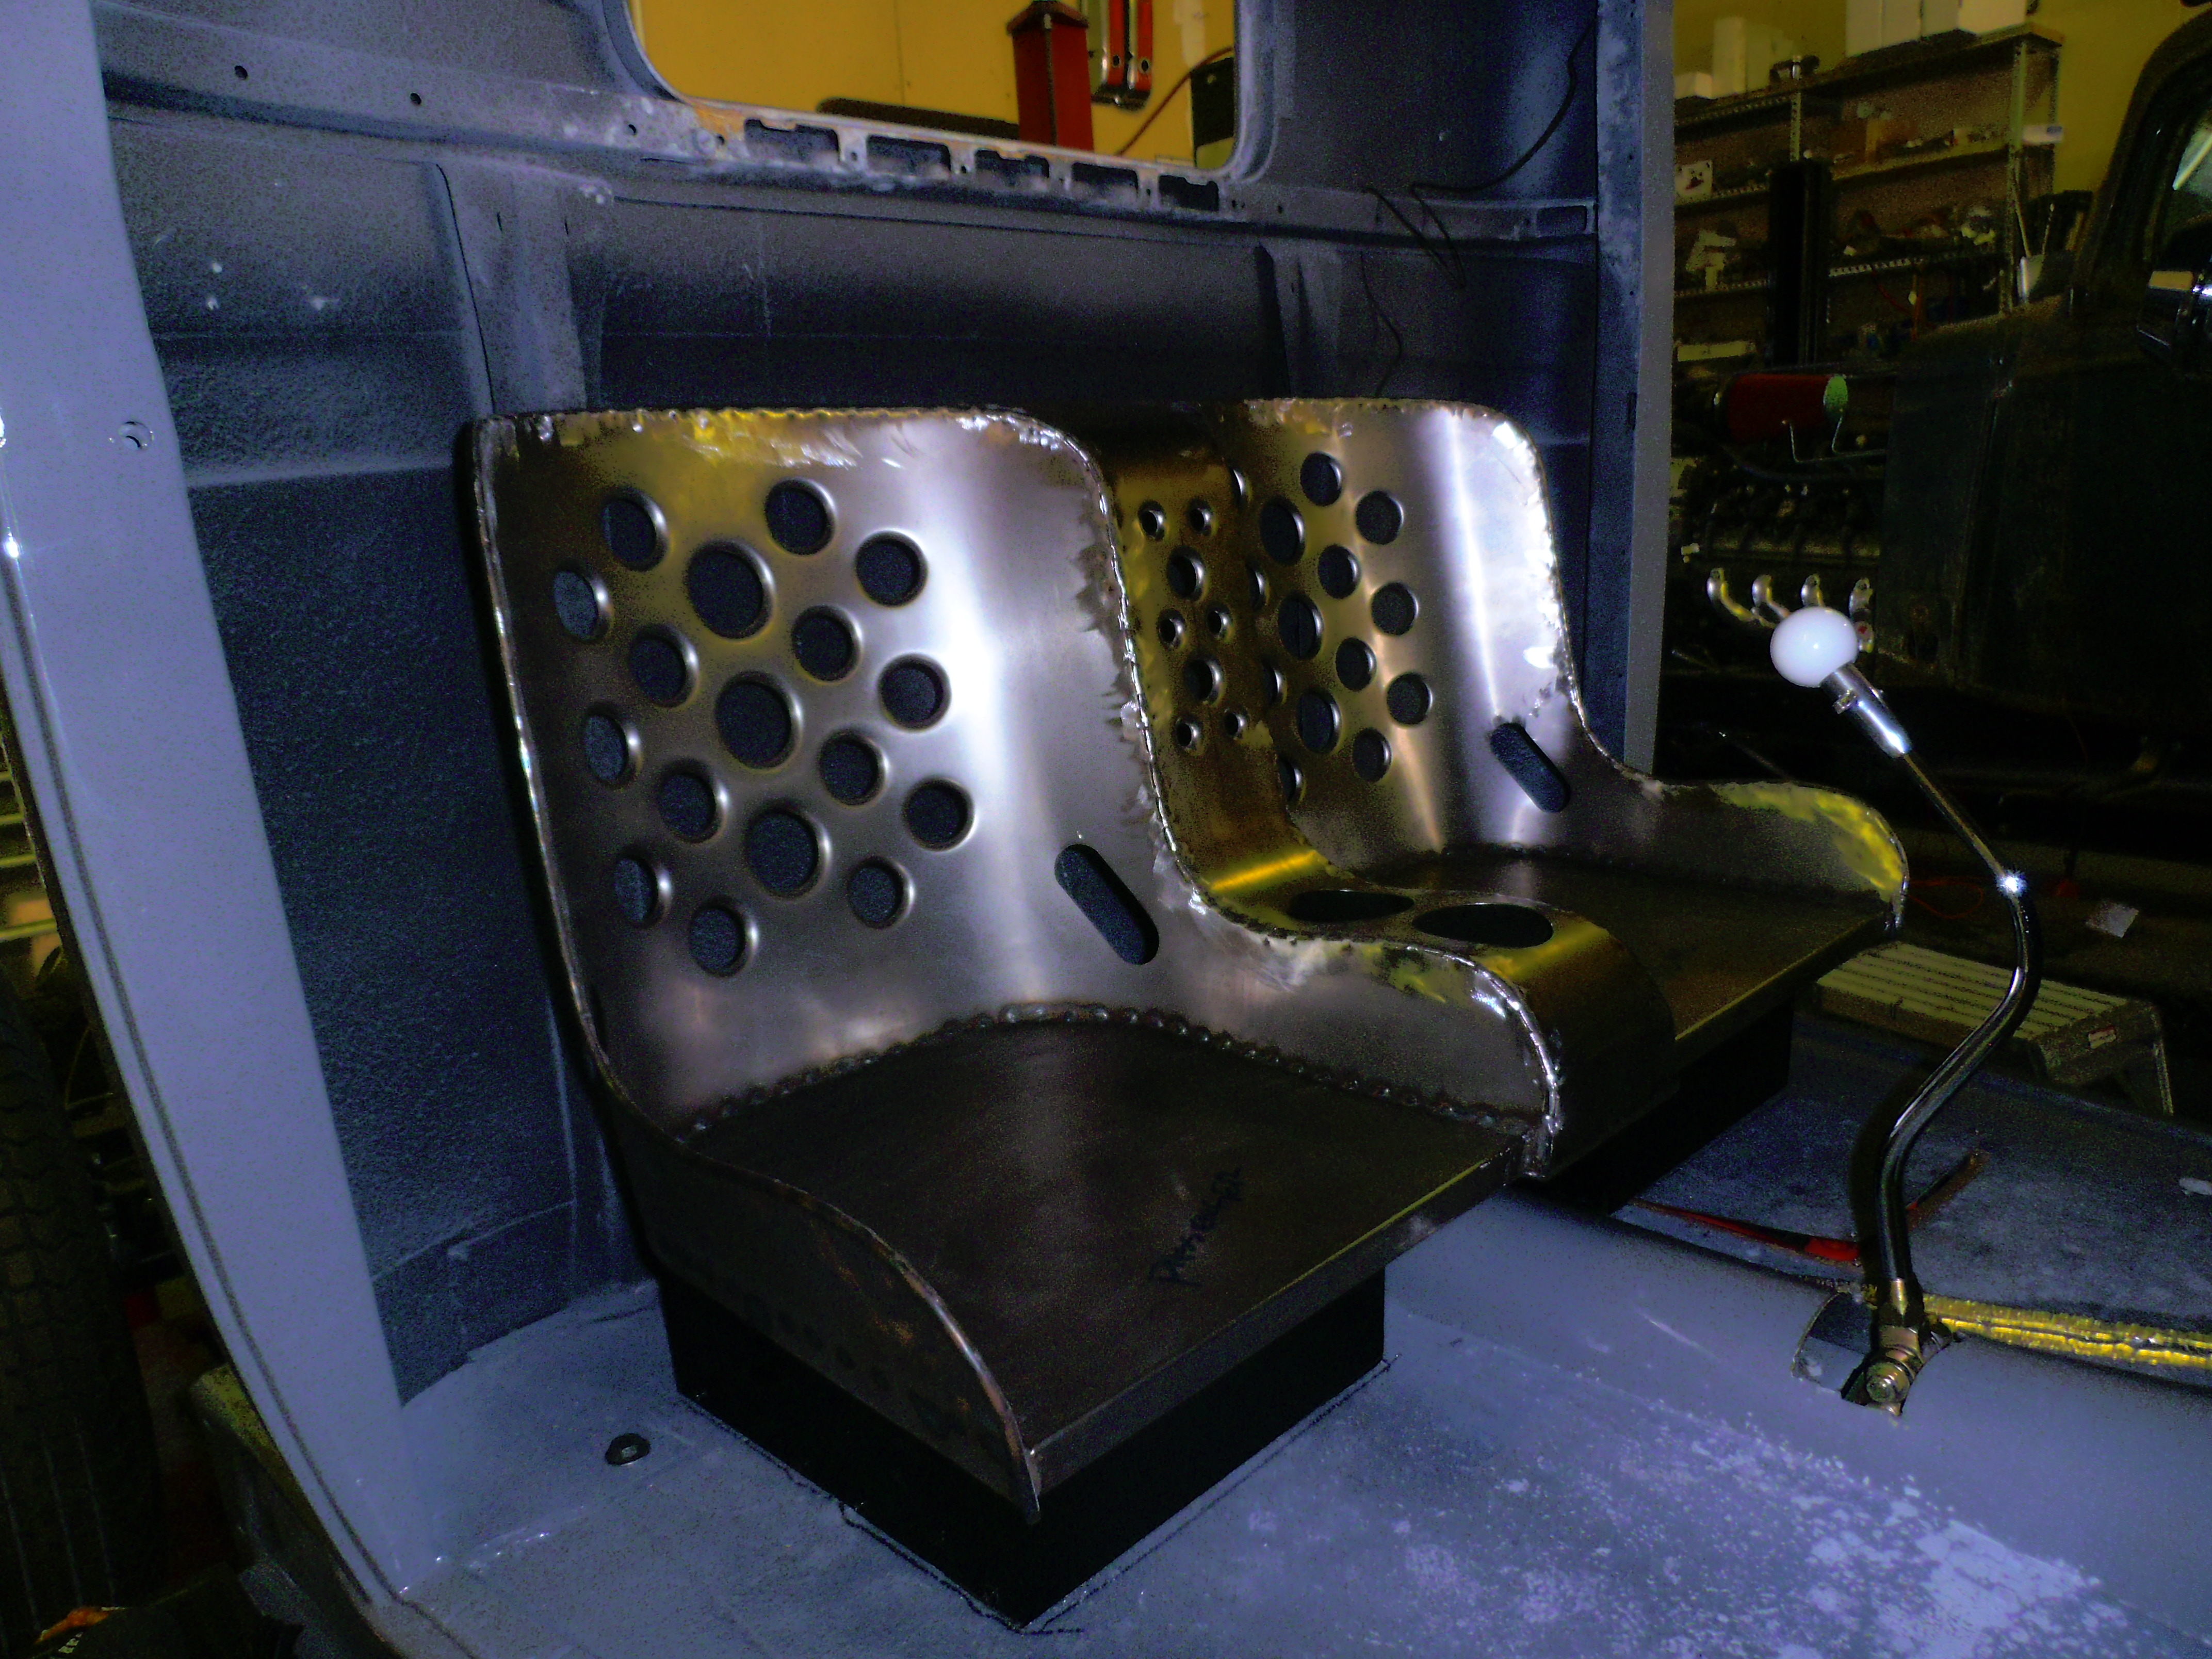
Here is a view of the seat inside the cab and resting on the new risers. The seat at this point has neither been welded nor painted. But we are trying to do in our amateur fashion what real ergonomic engineers do in a serious way. Will everything be reachable, operable, comfortable?
We are a wee bit better than merely hoping it will all fit together and look good. But there will be a lot more fine-tuning required in the near future.
May 25, 2018. This build is taking a very long time. But that is the usual way of these matters. The “one week builds” you see on TV are fictions that cannot be repeated by ordinary people. They are done by behind-the-scenes crews with enormous budgets. So none of that applies here and there is no better example of how ordinary problems, like a seat, can consume large amounts of time and resources. 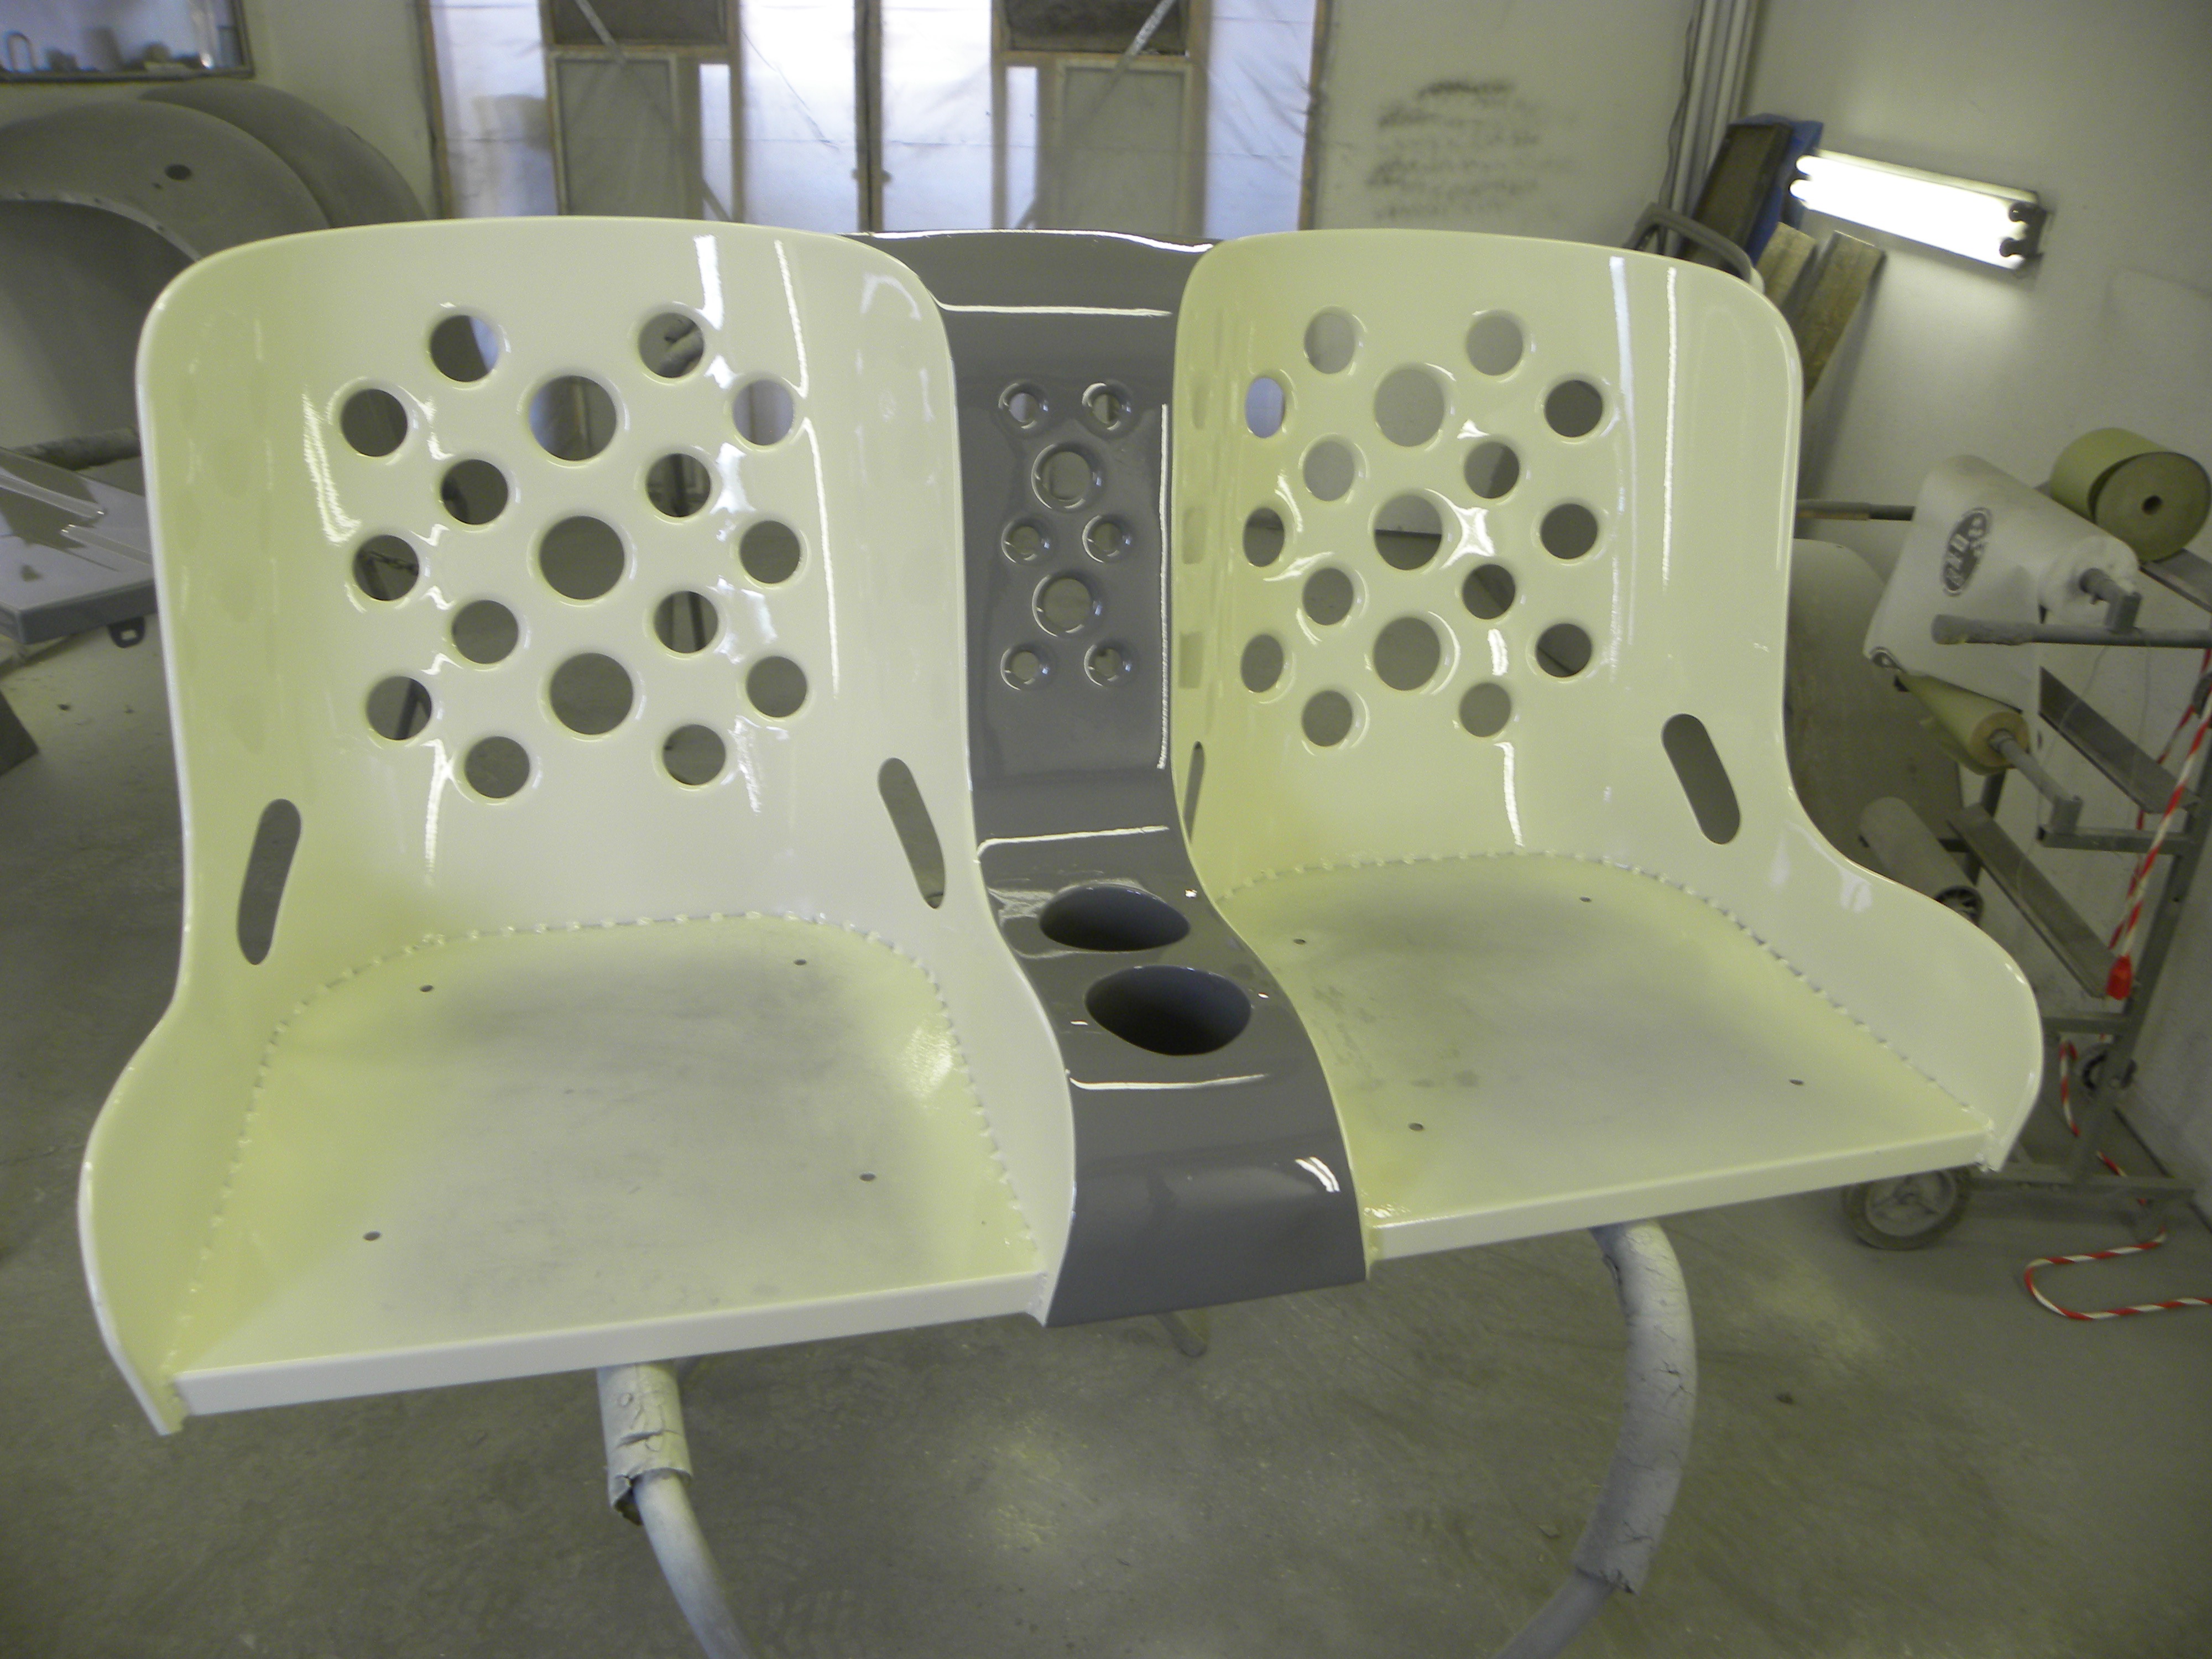
Here, at last, are the new seats. Clearly, they have been painted. But what goes unseen is the huge amount of welding, grinding, and smoothing that went into this before the painting was complete. The seats are steel not aluminum and that fact is both good and bad. They weigh a lot more and welding on steel is different in ways that complicated this particular design. But never mind. Notice that the center section, between the seats, is the same grey color as the transmission tunnel cover and it should flow almost seamlessly forward across the floor.
The image on the right shows off the sides and the back of the seat to a better advantage. There is still a lot that we haven’t planned concerning the interior. But a clear theme is now established. The lower seat cushions will be black distressed leather. The seatbelts are heavy aircraft-style (see photo above) and will be added soon. Finally, we have turned an important corner. I think it will be a stunningly beautiful interior for a different kind of hot rod than I have been involved with before.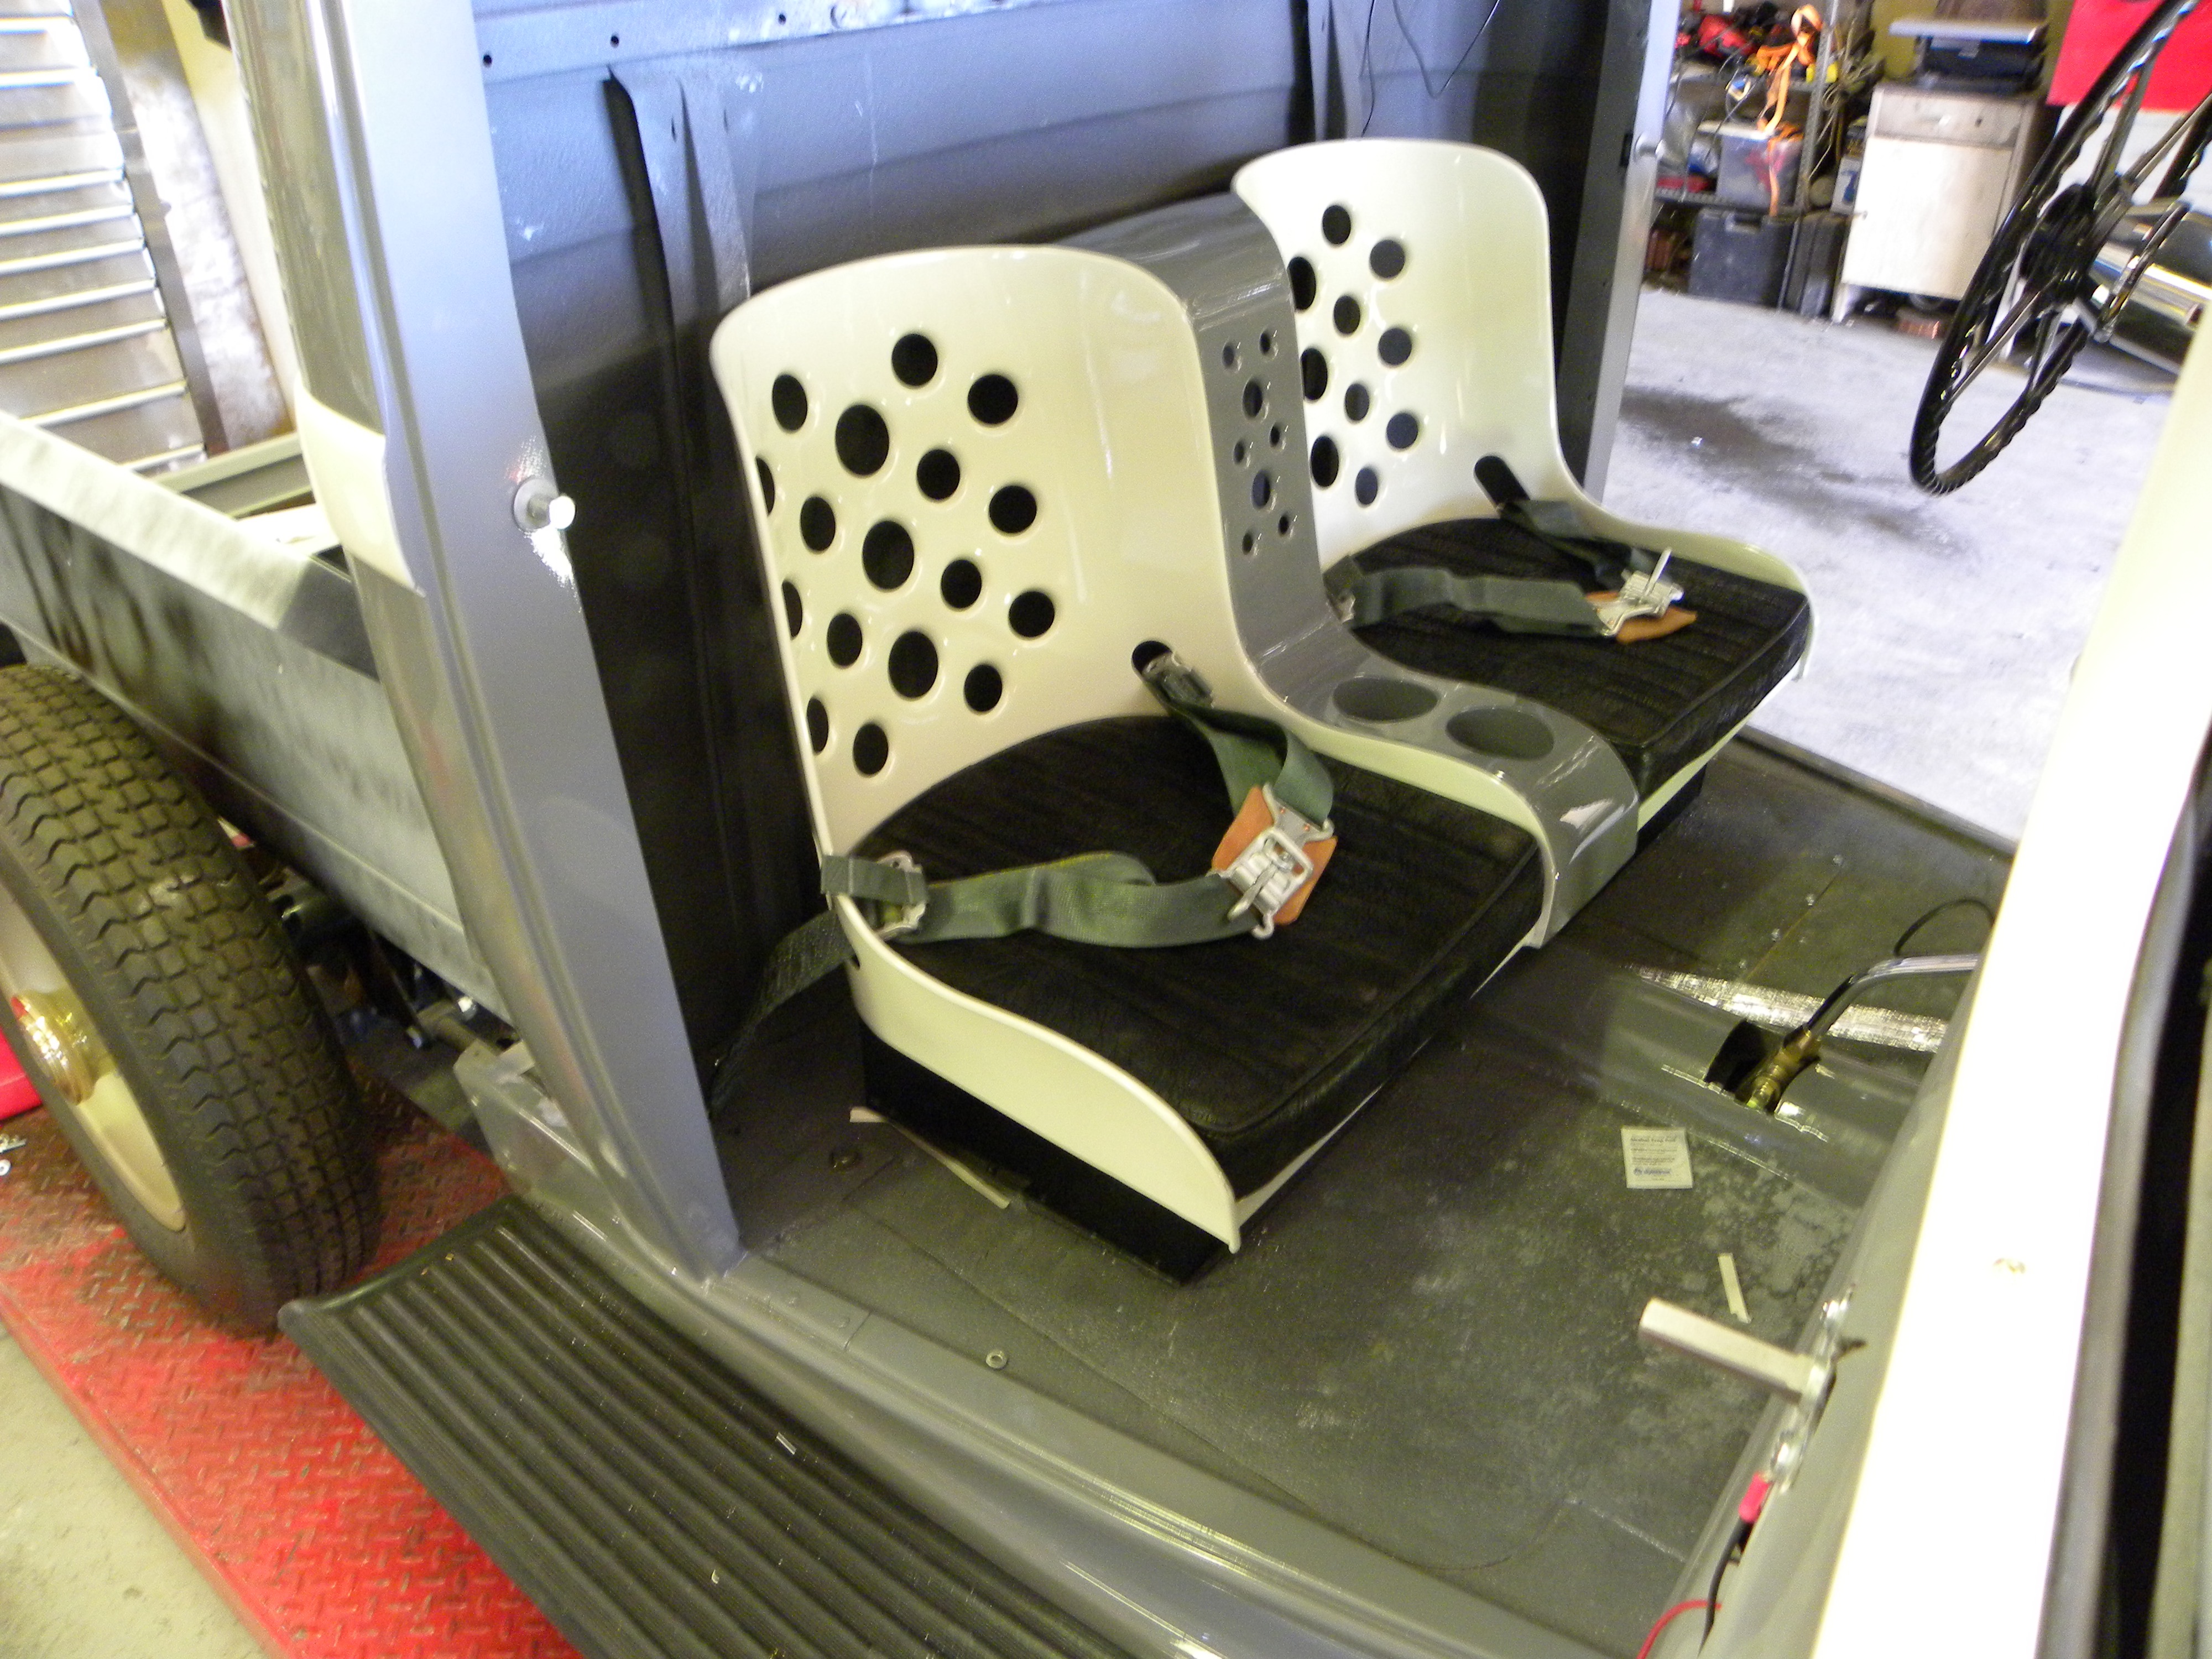
New seats are in and on risers with seat belts attached. It all looks unfinished at this point and it is. But this represents a lot of progress. If you are still not convinced I only ask that you suspend judgment a little longer until the rest of the interior comes together but the seats are in and it is time to move on.
As the interior has slowly taken shape, small additions have been made that add to but don’t complete the final anticipated look. Below we see the insertion of a body-colored panel that provides support for the interior light.
December 9, 2019. Yes, it has been a long time. We are still on the topic of seating but under an enlarged sub-heading “upholstery.” The Dodge went into Justin Stephens Upholstery in Salt Lake City about ten months ago. This is not your average automotive interior shop. They fancy themselves as catering to an elite class of customers. I may not belong to that class but the truck is and there just weren’t many options open to me. I choose them because they were close by. Most customers choose Justin Stevens because he is famous, turns out great products that are associated with the Kindig Auto Shop which is part of the same industrial complex in Salt Lake.
But it was a mistake. The shop is first rate but they can’t deliver on schedule and don’t keep their promises. In early October of 2020 I discovered that the interior was just about at the halfway mark.

As luck would have it, I found a young man who has done high quality automotive interiors in California for most of his adult life. Candido is a pro and the Covid19 pandemic has brought him to Utah and I was fortunate to fine him.
Ralph will deliver the Dodge to Candido on election day, November 3. We have decided to use off white ultra leather. Should be stunning.,
